Bekijk terug alle berichten.
Amiga Case Modding
I did a new "paint job" on an Amiga case. (Normally they are white)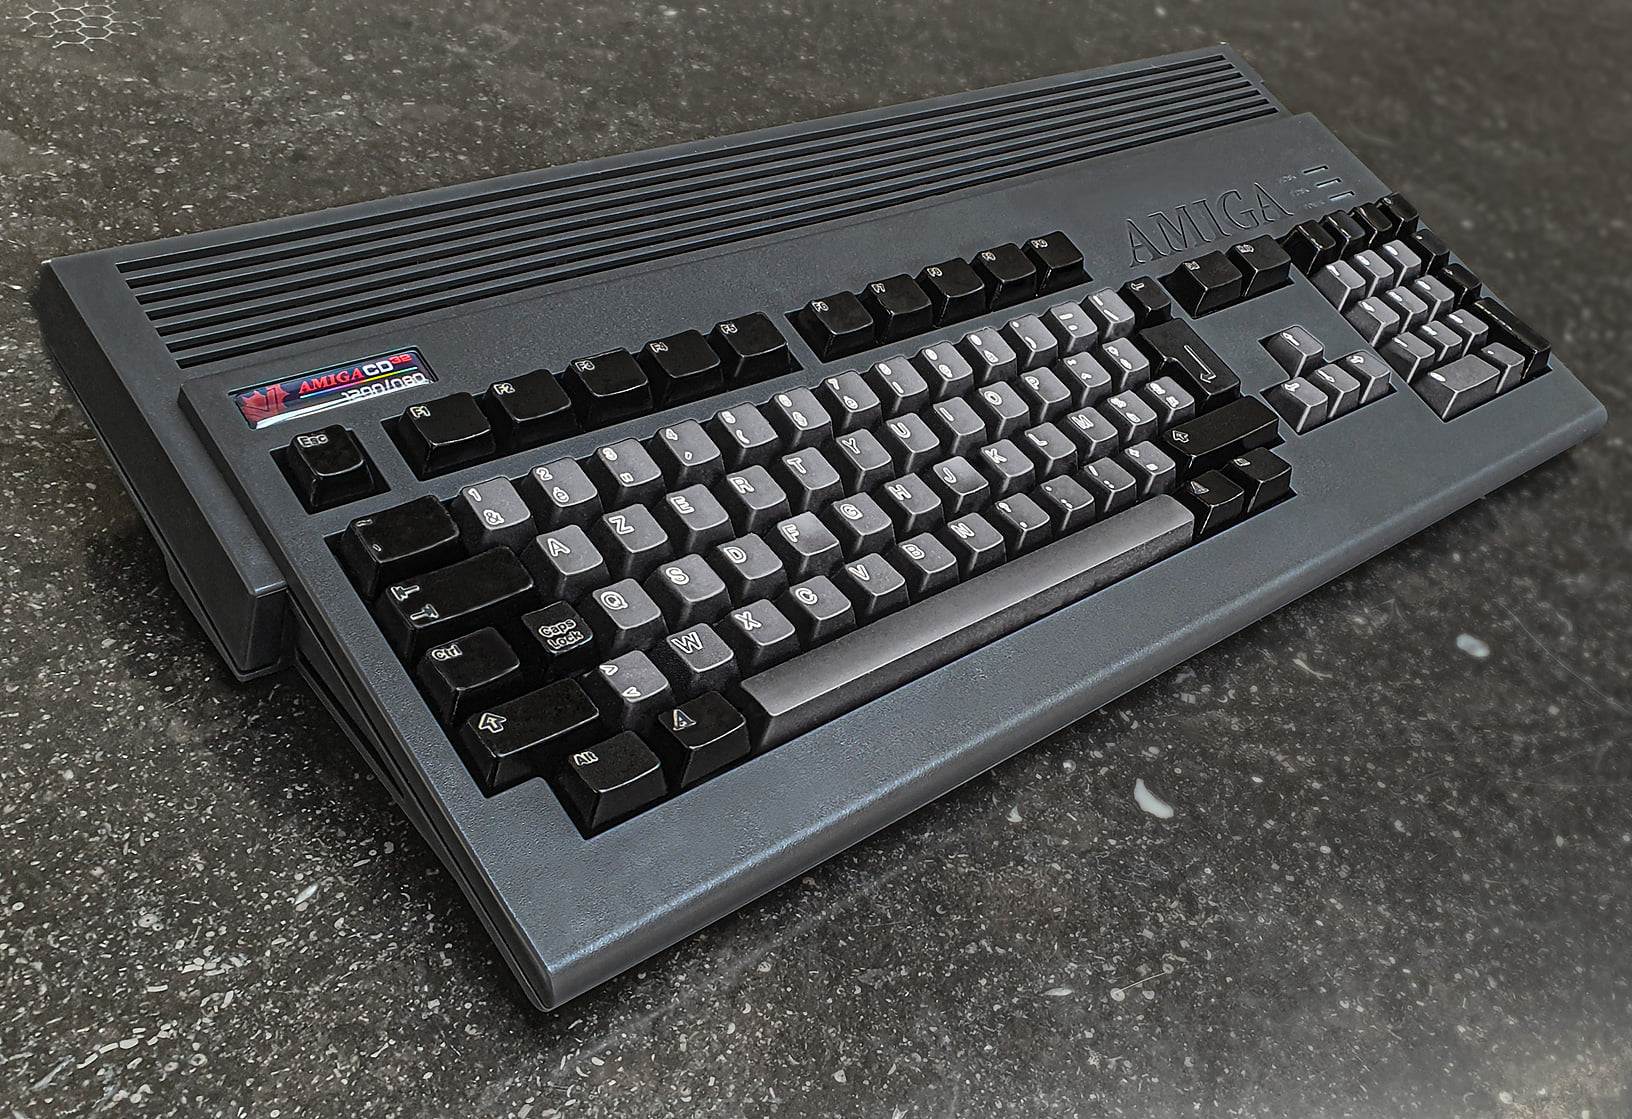
I am totally in love :-)
The case is one from a1200.net in "CD32 grey".
I also pre-ordered the matching keycaps like 2 lifetimes ago - but they still have to deliver, always a lurking issue with these kickstarters.
Anyway - I decided to do a DIY.
I posted it on some forums and got surprisingly many reactions asking how I did the keycaps.
Super easy actually, but here it goes.
I used iDye Poly. It's a dye that bonds with most plastics but - luckily - it doesn't bond with the little protective cover that is on the letter of the keycaps on Amiga 1200 models.
This result in the original key-color shining through as a small border around the lettering, making sure the letter is still readable.
Rather a funky effect!
Before dying, make sure you're keys are super clean and evenly coloured. I even brighted mine a bit with hydrogen peroxide.
The instructions that come with iDye Poly are meant for dying fabrics. They tell you to use boiling water, but whatever you do: DO NOT BOIL YOUR KEYCAPS!
They will warp and bend, making them unusable. (believe me, I know from experience :-/ )
I used water of about 50 °C.
Add the dye, add the color intensifier that comes with the dye.
Stir, pop in keys.
I use a 1 liter transparent plastic bottle with a wide opening. That way you can close it and give it a good shake, making sure all keys are subdued in the dye.
I used the "silver gray" color for the gray keys. The dye works pretty fast and I only left them in for about 2 minutes.
The black keys I left soaking for a few hours (in the color "black") and that was a mistake.
After some time, the dye builds up to a sticky goo, making the keys a bit smudgy.
I evened them out with some acetone rubbing but still they are not a sharp as they should be.
I finished them of with a few layers of matte varnish for the gray keys and high-gloss for the blacks.
I knew upfront this would make them dust-magnets but hey ... looking as cool as that is hard work!
then the finishing touch: I designed a custom badge with the vampire logo in CD32 theme and asked the "BadgeMan" to print it.
Cherry on the pie!
I did one before - a 600 model.
There I did the complete case and painted the keys black.
I applied some Amiga-specific keyboard stickers made by iComp.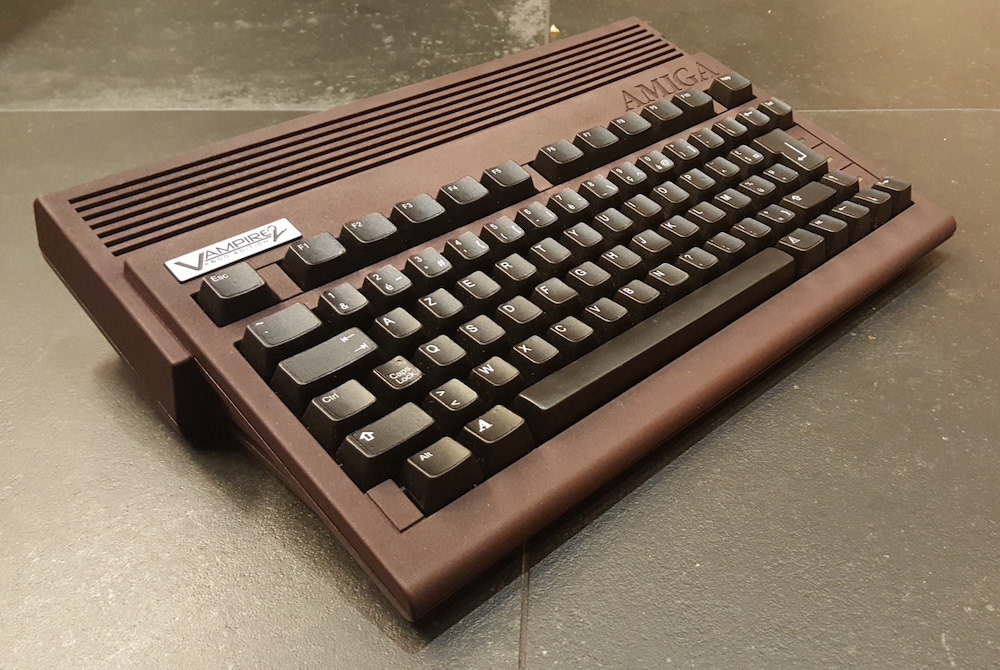
Also nice!
Tags: Commodore Amiga, TinkeringGeef je reactie (1)The bigger plan of my Amiga-Javascript projects
The past years I have been slowly tinkering on various Amiga Projects.
Mostly in JavaScript, mostly to unlock various parts of the huge Amiga ecosystem: parsing ancient filesystems and fileformats, reading and writing Amiga files with new tools, ...
Slowly all these various tidbits are coming together in the big plan: to break the Amiga out of it's emulated container and to seamlessly integrate in a modern OS.
That modern OS is platform independent. It runs on everything and it is accessible from everywhere.
For me, this translated to an OS that is web based. It runs in your browser and it lives in the cloud.
There have been many approaches to such an OS, some of them - like FriendUP - clearly have their roots in the Amiga system.
One of the most interesting ones is Amibian.js. It's also inspired by the Amiga and it runs in javaScript: Node.js on the backend, browser in front.
I've been talking with Jon - the creator of Amibian.js.
It's a HUGELY ambitious project, ranging from custom compilers in various programming languages to a recreation of an Amiga-like OS, complete with compatible system library calls and more.
When doing a modern Amiga inspired OS, one of the big questions is how you handle legacy software.
The Amiga has an old but super mature ecosystem of programs but sadly all that software doesn't run anymore on modern systems.
The solution is to emulate that old hardware so you can still run all that old software.
The most used Amiga Emulator is WinUAE, a glorious and ultra-advanced piece of code.
Rupert Hausberger did the daunting task of porting it to javascript.
The drawback of emulating an Amiga is that it is a contained black-box system that has no knowledge of the larger system it's running on. WinUAE handles this quite elegantly by allowing a shared filesystem, but in your browser there's no such thing.
This is where I stepped in: an emulated boxed Amiga running in your browser is cool, but wouldn't it be even cooler to break it open?
You could use Amiga software to seamless edit/play your local files,
or launch modern non-Amiga tools from within the Amiga,
or compile a program for Amiga with today's tools and launch it directly on an emulated 68k CPU
or ....
All this directly available on whatever system you use and wherever you are.
In the end, the underlying technicalities shouldn't matter.
It shouldn't matter what OS a program was written for, or where your files are exactly, or even who's physical machine you are using. Just launch your space and mold it to your liking.
Amibian.js already tries to break the barriers between the browser and your local system.
Browser or native? It shouldn't matter.
I will gladly help and try to break the barriers between the emulated environments and the native ones:
Emulated or native? It shouldn't matter.
The top video is a first demo of the progress. It shows various aspects of building such a system.
Most notably a shared filesytem so both systems (emulated and native) can access the same files.
Everything you see is running in the browser.
The (emulated) Amiga is on the right, the host system is on the left.
We're still doing babysteps: trying out stuff and laying the foundation for the bigger plan.
The concept is always the same: a seamless integration where it doesn't matter anymore where your files are or on what platform your program is running on.
Tags: Commodore Amiga, in English, Programming, Scripting, TinkeringGeef je reactie (0)Powertool Drag Racing
Op zondag 27 november deden we mee met het Belgisch Kampioenschap Powertool dragracing.
Ow Yeah!
Het concept is simpel: Je neemt een elektrisch handgereedschap en je vormt dat om tot iets dat zich kan voortbewegen. Je hebt een baan van 20 meter en een start/stop knop. Je racet met 2 tegen elkaar en wie als eerste de finish bereikt is gewonnen.
What can possibly go wrong? :-)
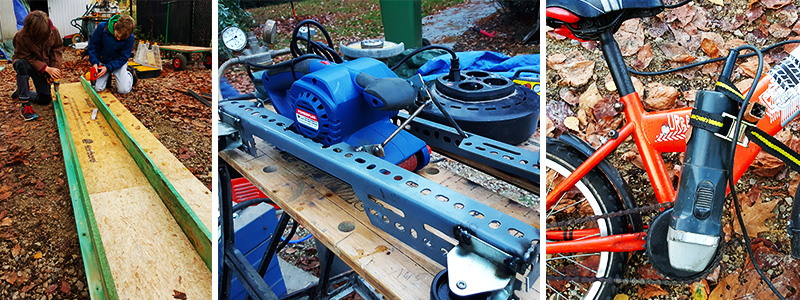
We begonnen met een bandschuurmachine. Dat schiet al aardig vooruit als je dat niet vasthoudt, maar is ook wel wat saai en voor de hand liggend. Dat kan beter!
Een oud kinderfietsje met in plaats van trappers een stevige slijpschijf. Dat werkt, maar de motor van de slijpschijf levert duidelijk veel te weinig vermogen: na een paar meter smeult de plastic behuizing er net niet af.
Daar dienen tandwielen voor natuurlijk!
Wegens gebrek aan reuze-fietstandwielen tekenen we een T78 tandwiel (met 78 tanden dus) en nog een paar kleintjes.
Bram heeft connecties en kan het rap laten uitlaseren uit 3mm staalplaat. Handig, zo'n Bram-gerief in de buurt.
Wat mep- , slijp- en laswerken verder is ons Frankenstein geval klaar.
Racen!
Van de 19 ingeschreven ploegen verschijnen er 16 met een rijdklaar vehikel aan de start.
Goed om te zien dat de funfactor en teamspirit overheerst.
ATV en de VRT zijn present, de kinderen worden geïnterviewed door Karrewiet. Plezant.
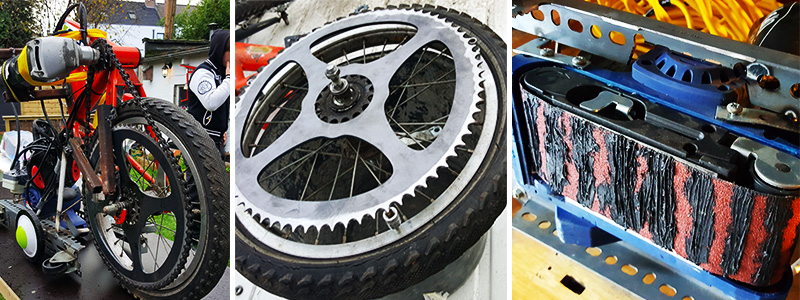
Na een paar gewonnen races komen we onze meerderen tegen en begint ons ding ook al wat uit elkaar te vallen.
De rubberen groeven van de schuurband zijn spiegelglad geworden, ons steunwieltje is door de wrijvingshitte vastgesmolten aan zijn as en door een iets te harde botsing met de finish breekt uiteindelijk de as van de slijpschijf af.
Toch een 5de plek. Niet slecht!
De overwinning gaat uiteindelijk terecht naar het dodelijk efficiënte "Atelier Vilvoorde".
Mijn persoonlijke favoriet is toch wel team "LaDa" die alles ge-3D-print en uitgelasered hebben. Schoon gerief, maar door de harde finish-botsingen breken hun verbindingen en grondplaat door en stranden ze in de finale.
Yep! Dat was een plezant projectje met plezante vrienden en zonen - dat mag nog!
Dikke merci aan Anthony voor de organisatie.
Physical buttons for your Sonos
I totally love my Sonos system.
The Sonos players are expensive but they are worth every penny and i haven't regretted any of my Sonos purchases for a minute.
There's one thing missing though ... hardware buttons!
Even as a smartphone or tablet to control your appliances is perfect (remember 2009?), sometimes you just don't have your smartphone ready at hand and you find yourself hunting for your smartphone to control your Sonos.
Yes, each Sonos has some hardware buttons, but they are only used to play/pause the current song, or to adjust the volume of that particular player.
Enter D.I.Y.
I'm a big fan of old tube-based radio's. If they are not too far gone they get repaired, otherwise they just look cool.
One particular little radio-bugger was beyond salvation and received another purpose: controlling the Sonos with some presets, volume and play/pause with its old-school tactile click-clack buttons.
The final contraption looks like this:
very incognito. looks like a radio, no?
On the inside the buttons are wired to a little Arduino.
When you press a button or turn the volume knob, one of the digital or analog inputs of the Arduino is activated, allowing you to define a resulting action in software.

There's a little WiShield attached to the Arduino allowing it to communicate over wifi with other devices.
Although it's possible to talk to the Sonos devices directly using the UPnP protocol, it's easier to use a some sort of middleware like the excellent Sonos Http Client by Jimmy Shimizu .

The WiShield is rather old in terms of IT-gadget-age and its libraries are not compatible with the current generation of Arduino IDE.
I had to patch them a little to make them work on Arduino 1.x and up. You can find my fork here.
The little Arduino sketch that controls everything is also on my GitHub.
A little status led completes the setup, giving some feedback on your actions.

With the radio buttons i can now activate the 5 presets we use the most, change the volume of the grouped sonos speakers and pause/play everything.
The presets are currently 3 radio stations (Studio Brussel, Radio 1, Radio Nostalgie), the Spotify favourite list (starred tracks) and a random Spotify playlist.
Due to some wonderful coincident the labels of the buttons also EXACTLY match the preset they trigger:

How convenient!
The concept is a bit hard to explain to people who don't have a wireless speaker system.
Most of the time they just stare blankly and go
"Uhm ... so you've build a radio that you can use to ehm ... turn on the radio? ... Ok ... cool ..."
Exactly!
Just like software controllers as Ableton Live end up up creating matching hardware controllers with LOTS of buttons, let's hope this is the start of a trend.
There's nothing like the feeling of pressing a big chunky button down and make it go *CLACK* , far more satisfying than using the non-tactile buttons of a touchscreen controller ... .
Hmm, I still have this thing somewhere in my garage ... what still needs controlling?
Tags: Arduino, in English, Programming, TinkeringGeef je reactie (3)
Airwave Pong Style!
Wave you hands in the air and pong it like you just don't care!
I like old stuff: it has a story, it is used. it has flaws.
And exactly those imperfections are interesting. Waba-Sabi you know?
That's why I ditched all my CD's and moved back to Vinyl,
and that's also why In my opinion most "pre-computer music" sounds better.
When you take a basic step sequencer or midi program, it's a robot: all notes are aligned on a fixed grid and it usually takes some effort to get a "human feel" to your music.
Now what if you could ease it up a bit in a fun way?
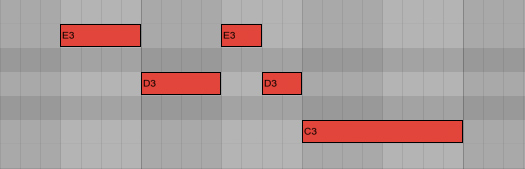
Let's take the graphical representation of a "beat" in most common step sequencers.
and let's take this thought one step further: the graphical representation defines the music, right?
So what if we alter the graphics, would the music change too?
For example, if we want to add a fade, we can just as well use photoshop to add some blur, right?
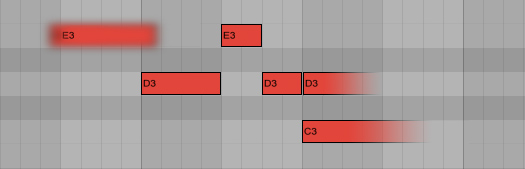
And if we want to loosen up that fixed grid, why not use a graphical filter to make it more "wobbly"
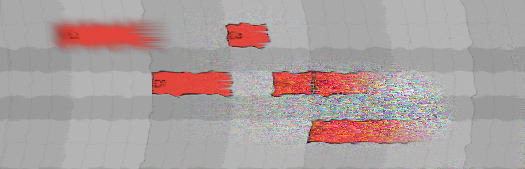
This way we can use graphical tools to mold your music into a more organic shape.
And more!
What if we could "read" any image in a musical way?
An image consists of lot's of coloured dots, each dot has some info we can use. on a computer screen, this is for example the amount of red, green and blue and the transparency.
We can sample that info from an image and use it for something musical.
An example: move you mouse over this image of a jungle, to explore it in an audio-way. (Well ... after you click on it to open the demo, right?)

To pour that into something musical, we can use "the bouncing ball" effect: a ball bouncing around in a rectangular box has 2 rhythms that are both fixed but as the sides of the box are not equal, the rhythms are constantly shifting.
It has the predicable structure of a beat box, but also the unpredictability of 2 patterns intermingling: Exactly the interesting effect we are looking for.
Try it out for yourselves!

(Seriously: leave it running on chrome or safari for a few hours: it's very relaxing!)
Of course we don't have to use a static image, we can use a video or ... a camera!
That is when things really get interesting: when you connect a camera as your graphical/musical input source, you can interact with your musical model live, in front of your camera.
Add a little motion-tracking and color-tracking, and you get a pretty accurate way of triggering musical events using your webcam.
To go all the way back to music software, we can even add some MIDI to trigger midi events using your webcam, and to record everything you do in your midi sequencer to take it further along towards a full musical production.
Wham! Before you know it, you got yourself a playful musical instrument.
Of course, it's a bit hard to control. It's probably wise to limit yourself with some quantization or some predefined chord schematics to get the sound you want.
Fiddling around with all my prototype toys, I created this demo song - I call it "Airwave pong" (You now: Wave you hands in the air in front of your webcam - combined with pong)
To be honest, I had to do a lot of post-processing on the midi data ... my motion tracking routines are somewhat crude and fly all over the place.
If you want to try it out for yourself, come find me a Barcamp Antwerp 7 this saturday, where I will be doing a live demo and will release all the tools I used.
Yes indeed: barcamp STILL is one of the most inspiring events EVER.
The concept is simple: short and open talks about anything you're passionate about.
The presentations won't be perfect, but they will be real and honest, which makes them far more valuable then about 90% of al other talks on "professional" events.
So if you happen to be in the vicinity of Antwerp, do yourself a favour and drop by #BCA7
I can't wait !
Foto door Simon Schoeters
Tags: Graphics, in English, Music, Programming, Tinkering, VideoGeef je reactie (1)Leave a light on
Schoon, die "Leave a Light On" van Marble Sounds.
Voor diegene die - net zoals ciska - goesting hebben om hun mooiste zangstem boven te halen en er een warme kerstversie van te brengen maakte ik er een instrumentale meezing versie van.
Ik zocht eigenlijk vooral een testprojectje om de nieuwe versie van Ableton Live eens uit te proberen.
Goe gerief, diene Live.
Hier is het midi bestand mocht je er zelf mee verder willen prutsen.
Als je Ableton Live gebruikt is hier het Live bestand
(en ook: koop hun album ! )
Voor de volledigheid hier de songtekst:
Sure I can leave a light on
Let it shine on
Leave it till dawn
Sure I can leave a light on
Leave a light on for you
It takes two to find a way out
There is no doubt
I will be around
If you have lost the right track
Then I'll lead you right back
Don't search to find
Don't smile just to be nice
Don't run just to get there on time
Be amazed
Simply blown away
Live on without
Getting off your cloud
Sure I can leave a light on
Leave a light on for you
Sure I can play a quiet song
I could just hum
Beat a soft drum
Sure I can play a quiet song
Play a quiet song for you
It takes you to make my heart sing
To let air in
And keep breathing
It takes two to keep the vibe true
I am waiting for you
It struck me again
We both look the same
But what you make
Appears in all shapes
I should impress
But nevertheless
I cannot change
Night into a day
So sure I can leave a light on
Leave a light on for you
© 2013 Marble Sounds/Zealrecords
Original song: Leave a Light on - Marble Sounds
My Little DrummerBot
Yay! finally took the time to finish a little Arduino project.
It's a another bot, more specific: a web controlled drummerbot!
Yes yes, the same old trick: web interfaces to physical objects: Me LUVS them.
Give me an Arduino and a browser and I'll build you your rainbow
Hey, I feel a song comming up!
Tap the drum pattern on your phone and this little bot will rock it!

You control it like most drum computers: you draw the beats on a pattern of sixteen dots, perfectly suited for generic 4/4 rhythms.
There a 8 lines, each controlling 1 servo motor.
Most of the servo's have a percussion item both on the left and the right, that's why the pattern buttons have 3 states: off, left, right.
That makes 14 distinct percussion sounds for the drummerbot.
The pattern in the webbrowser is packed into a string, which get send to the Arduino via HTTP.
You can use a wifi module and a http server on the Arduino, or you can use another device attached to the Arduino through a comm port.
The Arduino receives the string, unpacks it back to a pattern and simple loops over the steps controlling each servo.

the "DrummerBot Step Seqeuncer V 0.01 very-much-alpha" page is here
You can also download the Arduino code here.
I must admit: the drums sound a bit dry without amplification though.
I recorded everything into Ableton Live and did the final mix there. (Shocking, right? The videoclip is actually NOT a live performance :-) )
I'm specifically fond of the "Horns"
They are 2 little fans with a servo pushing a piece of plastic against the blades.
A hell of a noise but when you add heaps of fuzz, chorus and overdrive effects they are pretty convincing.
I call them F*CK-YEAH-HORNS
If you want to jam along yourself: hop over this saturday to Barcamp Antwerpen, where I'll be giving a presentation with/about the bot.
Let's play!
Barcamp Antwerpen 5
Dat ik barcamp een fantastisch concept vind, dat mag geweten zijn.
Zaterdag was de vijfde "Antwerpen" editie alweer.
Fijn te zien dat zo'n los gegeven zichzelf ook vernieuwt: ook al was het de 5de editie in Antwerpen en de tigste in Vlaanderen, toch bereikte het veel nieuwe mensen wat resulteert in veel nieuwe invalshoeken die (gelukkig) niet altijd geeky/techy zijn.
Fijn: nog steeds gepassioneerde mensen die iets uit het hart komen vertellen. Dat werkt.
Zoals steeds moet je meer sessies missen dan dat je kunt volgen. Gelukkig werden alle presentaties opgenomen (waarvoor Nokia een paar N8's leverde - naais) en zullen via http://www.barcamp.be/bca5 beschikbaar worden gesteld.
Goed zo, want al zag ik interessante en amusante presentaties zoals de trip in online memory lane van @mvissers en de analoge fotografie passie van @bunker - ik hoop achteraf toch nog een paar sessies in te kunnen halen op video. Voor mezelf is zo'n dag altijd een goede "deadline" om iets in elkaar te knutselen.
Meestal moet dat de avond ervoor dan nog gebeuren en deze keer was geen uitzondering.
Ik maakte een dinkie dat ik grootmoedig "robopet" noemde ter illustratie wat voor leuke kruisbestuivingen je kunt krijgen als je webinterfaces aan hardware koppelt.
Ook al had ik alle losse componenten afzonderlijk al wel eens gemaakt, het blijft toch altijd spannend of de theorie op zo'n korte tijd ook naar een praktische demo omgezet kan worden.
Wat klungelige wifi problemen buiten beschouwing gelaten, werkte het gelukkige wel: Ik had een "robotpet"-ding dat kan rijden en je op allerlei manier kon besturen (zoals via een wiimote) , dat video streaming doet, dat zelf zijn weg een beetje zoekt en dat wat media toeters en bellen heeft zoals text-to-speech.
Leuke demo - ik denk dat ik het robotje nog even in elkaar geplakt houd. Met al die RFID tags die hier in huis onder matten en vloeren zijn verstopt kan het ding al redelijk goed zijn weg vinden.
Mijn hoofdprobleem momenteel is de batterijduur. Ingenieus meesterbrein @kodel vertelde me dat ik Lipo batterijen nodig had, dus die moet ik eens in huis halen.
Dat robot-verhaal dat zou wel eens een blijver kunnen worden!
En als ik anderen kan overtuigen dat het belangrijk is om niet alles altijd even serieus te nemen dan is mijn missie al geslaagd :-)
Kzalt videooke posten als het er is. De foto hierboven is van Davy.
Tom merkte op dat ik eigenlijk altijd over hetzelfde spreek op zo'n barcamp: leuke dingen doen met http interfaces, en dat klopt : -)
Http is immers de perfecte command line interface voor mij, een soort digitale ducttape - als het ware. Misschien moet ik dat Relocally ding ook eens wat meer vorm geven, want dat was ook hier weer bij de robot 1 van de basistenen.
Ja ja, Het was een goeike, diene #BCA5
@topanga doet dat goed hè ... er steekt veel werk in en ze was aan het twijfelen of ze wel aan een #bca6 ging beginnen. Hopelijk geven de vele positieve reacties haar een duwtje in de rug.
Met dank aan de sponsers, want het ontbrak aan niets.
Burooz voor de locatie, Stad Antwerpen voor de broodkes en co, Medemerkers voor de (eigengemaakte) soep, Krimson voor het drinken, @cverbelen voor de GingerLoveTea, ...
vergeet ik er een paar? Verschoning
Tech45 was ter plaatse om hun (zeer aan te raden) wekelijks podcast op te nemen. Ik werd ook even voor de micro geduwd - linkje volgt.
Tags: in 't Nederlands, Lifelog, TinkeringGeef je reactie (0)
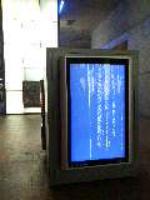
In silence
Tinkering with digital audio, I love it!
A few months ago I was exploring the use of the Ipad as digital recording device.
A small tune came out of it.
nothing too fancy, just a piece made from scraps i created as test with various audio apps.
Great fun!
My plan was to draw a videoclip for it - also on the iPad.
Yes: ... draw ... even at 1 frame a second, it meant lot's of work and grew tired of it.
It's one of those things that end up on the "to do whenever I find some time for it" pile, which is dangerously close to the "never" pile.
This image is one frame of it. 
We'll see about the videoclip part, but here's the audio track already.
You can download the mp3 here
It's called "In Silence"
It's completely recorded on the iPad, only using iPad apps, the internal mic and a (real) acoustic guitar.
Why? Because making music using toys is fun!

The synths, bassline and effects are from Nano Studio

The drums are done with Beatmaker, which also functioned as copy/paste glue between apps.

The recordings of voice, guitar, final sequencing and mixing was done with multitrack DAW.
Conclusions: using the iPad as mobile music studio is fun.
Some pretty good results can be achieved, considering the cheap guitar I used and the internal mic.
There are some pretty awesome apps out there which make the iPad a valid mobile recording studio.
However, one has to jump through some really weird hoops if you want to combine multiple apps and get the most out of it.
The lack of (access to) a file system makes it sometimes daunting to get the samples and tracks from one app to another.
You end up spending as much time swapping apps and moving files around then to actually create some music.
It's Apples vision to prefer usability over features.
That's great, but sometimes they end up in the paradox that their quest for usability actually makes the product less useful.
As Einstein reportedly used to say: "Everything should be made as simple as possible, but not simpler." , right?
More on that later in my GarageBand for iPad review
Tags: in English, Music, TinkeringGeef je reactie (3)There-I-Fixed-It

Fixing it in true There-I-Fixed-It-Style: Ducttape Forever!
#spoon #headphones
P.S. Still INSANELY proud I was on it:
The Zen of Hardware Hacking
The 4th Barcamp in Antwerp - And a great one it was.
I gave a talk about "The Zen of hardware-hacking" , indicating that there's a noticeable shift in my attitude towards hardware and software - I still want high-tech everywhere around me, but at the same time it has to be as invisible as possible, completely out of the way if you don't need or want it.
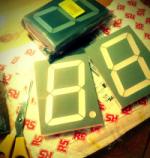
As a hardware demo - to make it a bit more concrete - I made the fantastic KWISKWAT-O-MATIC ! :-)
The technical part is an Arduino with a wifi shield that holds a little webserver.
The beauty is that - once programmed - it runs completely on it's own with VERY low power consummation.
When you access the webserver you can send little commands to control the physical object (the arduino) - in this case toggling some coloured lights.
Physical devices become a part of the web that way and are easy to connect to any webservice out there.
The KWISKWAT-O-MATIC is connected to the Telenet tv.be API I made some time ago: Whenever a new episode of Kwiskwat is aired (and recorded by the Telenet digicorder), the light turns green, if no new unseen episode is available, the light is red. 


Here's the Arduino script - it runs a very (VERY) limited webserver, which is perfect for controlling little hardware devices.
#include
#define WIRELESS_MODE_INFRA 1
#define WIRELESS_MODE_ADHOC 2
unsigned char local_ip[] = {192,168,1,120}; // IP address of WiShield
unsigned char gateway_ip[] = {192,168,1,1}; // router or gateway IP address
unsigned char subnet_mask[] = {255,255,255,0}; // subnet mask for the local network
//const prog_char ssid[] PROGMEM = {"Wireless"}; // max 32 bytes
const prog_char ssid[] PROGMEM = {"HTC network"}; // max 32 bytes
unsigned char security_type = 0; // 0 - open; 1 - WEP; 2 - WPA; 3 - WPA2
// WPA/WPA2 passphrase
const prog_char security_passphrase[] PROGMEM = {"12345678"}; // max 64 characters
// WEP 128-bit keys
// sample HEX keys
prog_uchar wep_keys[] PROGMEM = { 0x01, 0x02, 0x03, 0x04, 0x05, 0x06, 0x07, 0x08, 0x09, 0x0a, 0x0b, 0x0c, 0x0d, // Key 0
0x00, 0x00, 0x00, 0x00, 0x00, 0x00, 0x00, 0x00, 0x00, 0x00, 0x00, 0x00, 0x00, // Key 1
0x00, 0x00, 0x00, 0x00, 0x00, 0x00, 0x00, 0x00, 0x00, 0x00, 0x00, 0x00, 0x00, // Key 2
0x00, 0x00, 0x00, 0x00, 0x00, 0x00, 0x00, 0x00, 0x00, 0x00, 0x00, 0x00, 0x00 // Key 3
};
unsigned char wireless_mode = WIRELESS_MODE_INFRA;
unsigned char ssid_len;
unsigned char security_passphrase_len;
int ledPin = 14;
void setup()
{
pinMode(14, OUTPUT);
pinMode(15, OUTPUT);
pinMode(16, OUTPUT);
digitalWrite(14, 1);
digitalWrite(15, 1);
digitalWrite(16, 1);
WiFi.init();
}
// This is the webpage that is served up by the webserver
const prog_char webpage[] PROGMEM = {"HTTP/1.1 200 OK\r\nContent-Type: text/html\r\n\r\n"};
void loop()
{
WiFi.run();
}
-------------------------------------------
/******************************************************************************
Filename: webserver.h
******************************************************************************
Based on the TCP/IP stack and driver for the WiShield 1.0 wireless devices by Async Labs Inc.
*****************************************************************************/
#include "uip.h"
#include
#include "webserver.h"
#include "config.h"
static int handle_connection(struct webserver_state *s);
void webserver_init(void)
{
uip_listen(HTONS(80));
}
void webserver_appcall(void)
{
struct webserver_state *s = &(uip_conn->appstate);
if(uip_connected()) {
PSOCK_INIT(&s->p, s->inputbuf, sizeof(s->inputbuf));
}
handle_connection(s);
}
#define ISO_nl 0x0a
#define ISO_space 0x20
#define ISO_slash 0x2f
#define ISO_R 0x52
#define ISO_G 0x47
#define ISO_B 0x42
#define ISO_O 0x4f
unsigned char ch;
const char http_get[5] = {0x47, 0x45, 0x54, 0x20, }; /* "GET " */
unsigned short fill_buf(void* blk)
{
unsigned short webpage_len;
webpage_len = (strlen_P(webpage)>uip_mss())?uip_mss():strlen_P(webpage);
memcpy_P(uip_appdata, webpage, webpage_len);
return webpage_len;
}
static int handle_connection(struct webserver_state *s)
{
PSOCK_BEGIN(&s->p);
// read incoming data until we read a space character
PSOCK_READTO(&s->p, ISO_space);
// parse the data to determine if it was a GET request
if(strncmp(s->inputbuf, http_get, 4) != 0) {
PSOCK_CLOSE_EXIT(&s->p);
}
// continue reading until the next space character
PSOCK_READTO(&s->p, ISO_space);
if(s->inputbuf[0] != ISO_slash) {
PSOCK_CLOSE_EXIT(&s->p);
}else{
if(s->inputbuf[1] != ISO_space) {
if (s->inputbuf[1] == ISO_R){
digitalWrite(14, 0);
digitalWrite(15, 1);
digitalWrite(16, 1);
}
if (s->inputbuf[1] == ISO_G){
digitalWrite(14, 1);
digitalWrite(15, 1);
digitalWrite(16, 0);
}
if (s->inputbuf[1] == ISO_B){
digitalWrite(14, 1);
digitalWrite(15, 0);
digitalWrite(16, 1);
}
if (s->inputbuf[1] == ISO_O){
digitalWrite(14, 1);
digitalWrite(15, 1);
digitalWrite(16, 1);
}
}
PSOCK_GENERATOR_SEND(&s->p, fill_buf, 0);
}
PSOCK_CLOSE(&s->p);
PSOCK_END(&s->p);
}
The slides of my presentation can be found at http://www.stef.be/barcamp/bca4.html (click for the next slide)
They are not very usefull without the talk, but still ...
The Tech45 podcast was also present and made a special Barcamp Antwerp4 edition (with a little interview with yours truely, hopefully online soon)
Marco Frissen made some nice pictures 
More here
Thanks @cubus and @ichoosr for a very nice Barcamp, and thanks to the sponsors GVA, Sw�rl, Stad Antwerpen, Krimson, Just-Eat, Digiti, Belgian Cowboys, iChoosr
Cracklin Rosie on a Whole Lotta Mobile Phones
Who said iPhone OS, Android and Windows Mobile don't play well together?
Music apps are a really cool type of mobile application, they let you you unleash your musical creativity wherever you are and are perfect to jot down a quick idea or to jam along.
For years one of my favorite pastimes on the train was to do some retro musictracking with the brilliant Milkytracker, but this time I needed something more.
It turned out to be somewhat geeky, even for my standards :-)


The Phone Guitar is born out of a presentation I'm going to do next Saturday on MobileCampBrussels about mobile cross development.
To put my money where my mouth is, I decided to create the same mobile app - a small piano/drum sequencer thing - on 3 mobile platforms: Android, Windows Mobile and iPhone OS.
As a developer I didn't quite succeed: audio latency is a b*tch and building the app from the same source proved to be possible but unusable, so I ended up writing it three times: in java for android, in C# for windows mobile and in Objective-C for iPhone. More on that later, but boy did I have fun playing with it :-)
To play them all at once I just taped them on a piece of wood together with a battery powered speaker.
Add lots of audio cables and TADAAA: a very playable guitar shaped instrument that makes a hell of a noise :-)
I added Pocket Stompbox, a virtual amp with lots of great real time effects and of course the FANTASTIC iShred app from Frontierdesign
In screenshots, the setup looks like this


Instant gratification! Rock on!!!