As you might already have deduced: I like to draw.
And maybe harder to believe for a Nerd like me. I also enjoy sitting outside in the sun.
Combining these 2 proves a challenge though ... The best drawing experience I find on the iPad, but that is totally not suited to be used outside: the screen is barely visible.
I solved that by using a device with an eInk display: a Boox Note Air 4C.
Lovely device - except; it doesn't have a good drawing app.
Which is a bit weird because the internal note taking apps on the Boox offer a surprisingly pleasant drawing experience: zero-latency, a few good brush presets .... it would be ALMOST doable to use those as drawing tools.
Except: they store every stroke as vector object, and when the image gets more and more complex, the speed goes down the drain and you're staring at a loading screen half of the time.
The devices runs on Android.
There are a few good drawing apps on Android, but let's be honest ... it is not even a pale shadow of the super smooth drawing apps that an iPad has... sometimes, the closed garden of IOS pay off in app quality...
To be blunt: drawing on Android SUCKS.
It's just to sluggish and slow to be any fun.
Some devices solve that by just throwing more horsepower at the problem, but not my eInk device ...
My browser based dpaint.js also runs on the device, and not even worse then any other generic Android drawing app, but still to slow.
But how do the Boox native apps manage to offer that super-smoot zero-latency drawing in their apps?
The answer is as simple as it is brilliant: they bypass the Android layer and talk directly to the screen controller.
The screen controller has a few embedded system brushes, and a native library that translate those hardware brushes to software.
So when you draw; they freeze the Android screen, and release it again when you stop drawing. Brilliant !!!
Of course this only works on their devices, but that's good enough for me.
I want that, but then in my own app.
Only... documentation is incomplete, missing, outdated, or just plain wrong, and the system libraries needed are exatly that: system libraries that a 3rth party app can't access.
Boooohhhh!!
But of course, it Android and Android runs of top of a linux-like system, which are all open so ....
Enter the hacking mentality.
Decompiling and reverse-engeneering system apps is quite easy in this age of AI agents.
So after a few days of hacking ...
Here is "Boox E-Ink Draw"
It uses the device specific system-brushes to get that zero-latency drawing that we all love so much.
And it does slow down because the strokes are baked into a bitmap layer, not stored as a ever growing pile of vectors.
I only tested in on a Note AIR 4C, because that's the only Boox device I have, so it would be good to collect some feedback from users on other devices.
It's open source, free, simple but functional, and most of all: it offers a zero-latency drawing experience.
Source code and download links to the APK at: https://github.com/steffest/Boox-EinkDraw/
So here's a warm shoutout to ONYX or BOOX, the company:
you offer best-in class e-Ink writing and drawing tech. Your zero-latency strokes are the reason we love and buy your products. There are developers out there who want to pour their resources into developing for your platform, but for *peeps" sake... why do you make it so hard to get the information we need to do so? Please, pretty please - update your dev channels with some up-to-date info and code samples, so we don't have to guess and/or decompile your apps just to see how things work.
Oh, and the best part: it saves files in the same format as Dpaint.js , so if you need more advanced graphic stuff that is not present in this Android app, you can ping-pong between the 2 to get the best of both worlds.
SideQuest completed!
Back to the main game.
Happy drawing !
Another RSync - another demo.
I made "RUBBUR"
Released at RSYNC 2026
- Source code
- on Demozoo
- on Pouet
- on YouTube
The starting point was this track I made in Ableton Live.
I was playing around with the very nice "The Mouth" VST plugin, not knowing what I was doing, and suddenly out came this funky wobble bassline with this rubbery synth on top.
I couldn't reproduce it if I wanted too, haha.
I made a track around it and was bobbing my head on the beat.
Bam! Demo idea!
I have been exploring the Amiga hardware recently, from a software developer point of view, trying out what you can do with BPLCON1 etc. (Hey! you can set the horizontal offset for the odd and even planes separately! cool!) and finally wrapped my head around how to use switching bitplane pointers each scanline to do all these vertical stretching and scrolling things you see so often in Amiga demos.
After converting the song to tracker format, it turned out the be HUGE (in terms of diskspace) and I had quite a hard time trimming it down. I already had build some batch-sample squeezing features in my own BassoonTracker, but OpenMPT - the Swiss army knife for tracker files - has a much more finer control - and proved to be the perfect tool to get the size down, obviously in exchange for some audio quality, but hey ... it's Amiga! It can be crunchy!
I landed on 290kb for the tune. Still large, but doable.
Here's the tune in Bassoontracker
Vamos
Another thing I discovered is vamos - it's kind of like Wine (the windows emulator, not the drink) but then for Amiga.
It allows you to run Amiga command line applications directly on Windows or Mac at lightning speeds.
And low and behold! It works perfectly fine with the SAS/C compiler.
Sweet!
Now I can compile for Amiga on all platforms - including the Amiga itself - using the exact same compiler and setup.
Build System.
Having fast iteration times make all the difference.
I ended up using this "autorun" setup.
On the amiga side, I run this script.LAB loop
IF EXISTS run.flag
DELETE run.flag
smake
a
ENDIF
WAIT 1 SEC
SKIP loop BACK
This checks for a file: "run.flag", and if it exists, it compiles and runs the program.
Then, whenever I save a source file on my mac/windows; a filechange-listener writes to this this "run.flag" file.
The Amiga picks it up, compiles and runs the demo.
So, whenever I save a file, a second later, the program runs on Amiga.
cool!
And I was pleased to find I'm getting more fluent at writing C.
I don't mean "better", per se, but at least I wasn't fighting compiler and syntax errors all the time, so I could focus on getting something done, not HOW to get it done.
And - hip hip hooray! - I made the step to actually include some assembler code in my project.
Baby steps, but it's a plasma like effect that ran far too slow in C.
I still can't believe that actually worked. Yay!
So now I have a good example how to move performance critical code to an assembler function and call that function from C.
Nice!
To recap:
Things I learned
- how to flip an image horizontally using code
- how to use functions in assembler to speed up operations and call them from C
- how to scroll a screen horizontally
- how to use vamos to run the SAS/C compiler on osX and windows
- I moved from shrinkler to cranker for compression. Shrinkler compresses better, but cranker is faster to decompress.
- in the end, I avoided compression alltogether. If all assets fit on a single floppy, it's simpeler and visualy nicer to keep them uncompressed.
- another thing I figured out but did't use, was how to use the assembler INCBIN thing to include binary data in the executable. Good to know if I ever want a single file demo. For now, the approach to have a light startup exe to display a loading screen and post-load the data is fine.
Things I want/need to improve in future productions
- get a hold of timing ... Sync is all over the place and behaves differently on different machines. No doubt my code is still too slow, but at the VERY least I should measure how many cycles each part of the code takes. This is the reason why most effects run a bit faster on a 1200. I beat-synced the thing to be in sync on my machine, but the timing will be slighty of on other machines. This sucks ... To be improved in the next production.
Another demoparty, another demo ...
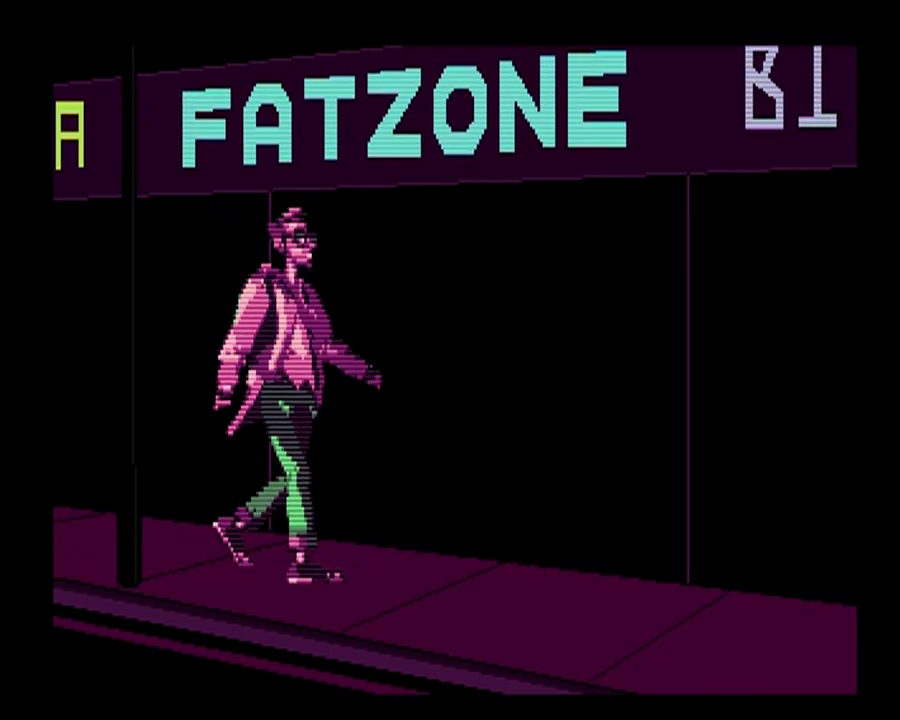
I made NAPHTA!
Released at RSYNC 2025.
An OldSkool demo for Amiga OCS inspired by a live performance I attended and captured of NAFT, a Belgian Live Analog Techno band.
The music is partially based on,
or at least HEAVILY inspired by "Paroxysm" by Naft.
If you want to check out the MOD file -> here in Bassoontracker.
It
runs on an Amiga 500 with 512k fast ram or beyond.
Technically, it's a big step up compared to my previous
production, but still: baby steps.
I really wanted to use assembler, but progress was just too slow.
I
got to the point where I could load some graphics and put them on a custom screen in assembler.
Yay! almost a
demo! But then each additional step took another week of dabbling and tinkering.
Deadline Rsync was approaching, so I made the executive
decision to move back to C.
Hardware banging this time.
I found this YouTube series "Amiga hardware
programming in C" that I could wrap my head around, and it gave me some much-needed direction.
Thanks Wei-ju
Wu!
Another "aha moment" came when Gigabates explained what the copper actually does, and - in essence -
how simple it is.
He said "For graphics, you can think of the copper as timed palette changes: You just wait for
a certain position on the screen, and then you can set any color index to any color, and then it will use that color
from that position going forward"
"Ping! ..."
Ooh!!! I can do something with that!
I started some experiments to have a patterned image
on screen. the image stays static but when you start switching colors, you can target each pattern section
individually and give it a unique color, circumventing the usual 32 color limit.
This is of course a well known
"copper chunky" trick, but I found it interesting that each "pixel" doesn't have to be square, it can be anything
you want.
This formed the basis of most of the effects in Naphta. (can you call them effects?)
I aimed
for some sort of stained-glass visual.
To keep things simple, I used horizontal patterns in 16 or 8 colors, so I
could avoid swapping colors midway on a scanline.
Also, I stayed away from color 0 to avoid having to reset it
each line when entering the overscan areas.
Yeah.... not the most hires copper-chunky, but it was a nice
experiment and usefully to wrap my head around the copper.
This is the image for the soft pixel blur
anims. The picture doesn't move, the animation is just the copper, setting palette colors like crazy.
The
"slowness" is not the copper, by the way, it's the C code that has to calculate the correct copperlist index of each
position. I probably should/could precalculate that too.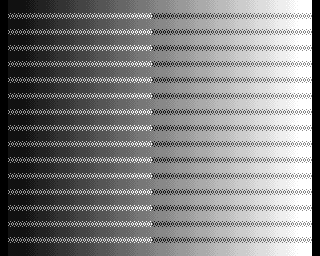
I'm still largely clueless in C-land. I really should dive into BartMans toolchain and set up a proper
monitor/compiler.
But even now:
Boy, oh Boy, oh Boy, now I FINALLY understand why everybody loves those
custom Amiga chips.
What a beautiful system.
Another interesting bit - Or at least I though so -
was the use of the music to drive the timing of the effects, and not the other way around.
I'm using the
excellent PTPlayer replay library and this supports
reading out the "E8" command.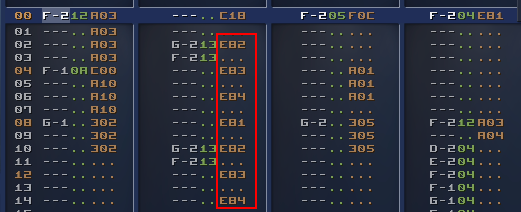
This way you can let the music
control which part of the code should be triggered, and you still can use all the Fxx commands you like to set the
music speed.
Double handy in my case as I don't have a clue how fast my code runs (I know it's sloooow though
:-) ) and often routines take several frames to complete, so having an external thingie to keep the timing is
nice.
And a third concept was that I got somewhat obsessed with "transparency" on Amiga.
Fact is:
transparency doesn't exist on Amiga OCS but ... we have bitplanes!
Bitplanes are layers stacked on top of each
other, and you can use that to "fake transparency" if you reduce the color count.
For example this scene uses 5
bitplanes, 32 colors.
The first 3 bitplanes are the base image in
8 colors.
Then the spotlights are on bitplane 4, forming colors 9 to
16.
So if you set those colors to a slight variation of the first 8 colors, you get
the impression of a transparent layer.
And we still have 1 bitplane left, so we can repeat this trick on
bitplane 5, forming the colors 17 to 32, giving the impression of 2 transparent layers.
The
way the display works on the Amiga is that each bitplane is "just a chunk of memory".
You can just point to
other memory sections if you want to display something else so you don't have to copy things around.
This means
that scrolling a bitplane is just "setting the pointer to the address of the row below".
This is trivial if you
know it, but it took me quite some time to switch my mental model of a "a screen is something you draw to" to "a
screen is just a display of several memory blocks".
Once you make that switch, suddenly you realise you can do
some pretty cool tricks.
Combined with the careful palette mapping, you then get - for example - the appearance
of a semi-transparent layer that is moving on a background.
Some key takeaways for future productions:
- Having a good build system is important. It's nice to be able to compile/run/test with a single click and to be able to iterate fast. Hooray for emulators!
- There's something fishy with my areafill code ... it sometimes barfs on low-spec machines, and it's way too slow. I mean: if I ever want to go 3D, I have to draw triangles, right ?
- I like the "progressive enhancement" approach. It still should run on a stock 500, but if a faster machine is detected, it might as well use it and swap to higher quality music/graphics.
- The "add21" command that EXE2ADF adds, causes a Guru in vAmiga (and only there?, weird) -> TODO: investigate because 21k extra chipram is most welcome.
- I should investigate trackloaders or find a way to load stuff from disk without blocking the main thread. Currently, I load EVERYTHING at the start which takes a stupid amount of time. Using compression tools like Shrinkler solve the disk-issue, but also cost a lot of time and memory, which maybe is not the best tradeoff.
- and again: assembler is the way if you want any kind of performance...
- even more important, maybe, is understanding how many cpu cycles each operation costs. an obvious one is: avoid mutiply/divide, unless it's by a factor of 2, and you can use bit-shifting. (and even bit-shifting is not free), so: I really need a way to measure these things to know what to avoid.
In general: I feel I'm just scratching the surface, still so much to discover and to learn, and making small
productions like this is an excellent way to do so, so ... on to the next one!
Source code is on
https://github.com/steffest/naphta/
Some more background info:
Tools Used:
Graphics:
Based on
live footage from the band "NAFT"
Images where first sketched on paper and then produced in PhotoShop, including
the Generative Fill tool, so I guess they are not AI free.
So yeah: those nice smoke effects are generated, not
pixelled by hand.
Images were finalized and pixel optimised in Dpaint.js.
Some chunky-pixel animations were taken from Giphy.
Music:
The main theme and some samples where lifted from the song "Paroxysm" by Naft using
various stem-splitting tools.
The mod file was composed by hand using BassoonTracker:
The disk version of naphta uses a
lower-quality compressed mod file to make it fit on a single disk and in 512k chip ram.
Code:
Home-cooked hardware banging C.
Compiled with SAS-C on the Amiga (but written in
modern editors)
Turn an old iMac into the Ultimate Amiga Game Experience
More info, images and downloads @ https://www.amigaclub.be/projects/arcade
I picked up one of my old projects again: BassoonTracker!
BassoonTracker is some sort of music sequencer in the "tracker" tradition.
Very retro, very geeky - I love it :-)
Most people - including me - use it more to listen to other peoples' songs than to create their own, so I polished the "playing experience" a bit and added playlists, amongst others.
Above is a small video of the new stuff on version 0.5.
Check out the full changelist of this release at the history page.
Underneath the surface, the code also got a mayor and long overdue overhaul: I moved to ES modules, making the code much easier to maintain and much easier to expand.
As a result, the initial footprint is much smaller - coming in at 97kb compressed - which is quite nice for an app that
- has a complete custom graphical UI rendering engine
- has a complete custom audio engine
- can read and write various old and weird binary file formats
For the past months, tracked music is more or less on non-stop repeat when I'm working as - for me - it's the perfect coding music. (After all; it's code itself !)
I like the fact that tracked songs are by nature open source: playback is in real time generated from the source samples, the musical notes and the effects.
If you hear an interesting part, you can instantly investigate how it was done.
Because tracked music comes from a time where diskspace was limited, the files are usually very small and don't contain long samples or lyrics, making them even more perfect as coding backgroiund.
I must say it makes me surprisingly happy that the BassoonTracker source code repository jumped the 1000-star marker recently.
Yay! I'm glad people still like tracked music.
(Check out this playlist with "demoscene releases" of this year - it really is a vibrant scene ! )
The BassoonTracker app can be found here - source code is here.
I participated in another Commodore Amiga demo, released at the "Gerp" demoparty this weekend.
Happy to say it took 1st place in the Amiga 40k compo.
I provided some graphics (logos, sprites) and some overall design.
All credits to GigaBates, though ... quite amazing what he manages to squeeze out of a humble Amiga 500 (and squeeze in only 40 kb!)
And mA2E provided an excellent groovy chiptune for the demo.
Well done, team! 🙂
Actually: most of the graphics I made got scrapped due to size constraints, but this means I already have some material for future releases.
So: On to the next one!
Downloads on https://demozoo.org/productions/336657/ if you want ot run it yourself on your Amiga.
Assembly source at https://github.com/grahambates/desire-fm
(oh man ... that code ... 🤯 💥 )
And also: probably the only time in my life I have 2 productions on the "monthly top 10" on Pouet.
Not too bad! :-)

I went to my first "demoparty" this weekend.
RSYNC in Leuven , hosted by some random scrubby guy called fRAnKY.
It's super amazing how many super amazing people can be at the same place at the same time!
Of course a demoparty is only a demoparty if you release a demo, and I didn't want to show up empty handed.
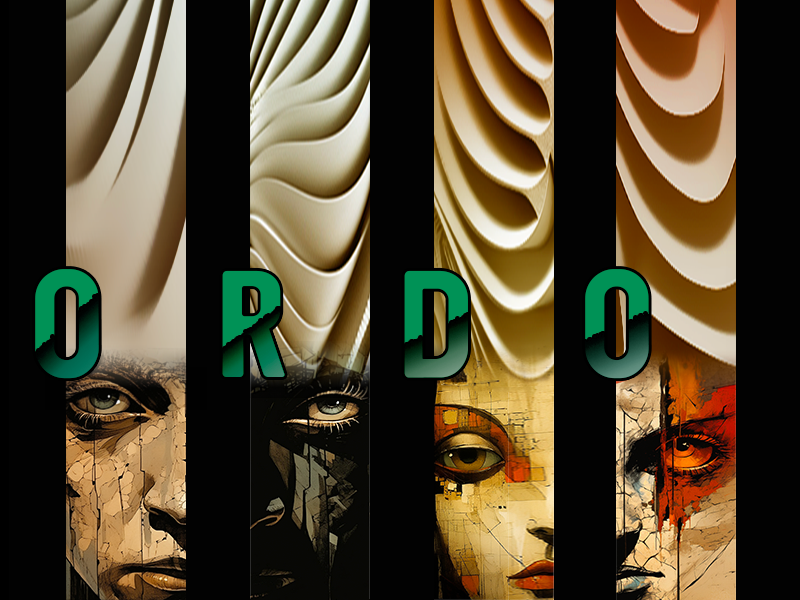
I made "Ordo", a visual story about the endless cycle of ORDER and CHAOS.
The first demo out of my own kitchen.
Mostly a glorified slideshow, though ...
I had the naïve idea to write it in system friendly C code and compile it on the amiga itself.
I know nothing about c and still don't - but it was a fun exercise.
In the end I only figured out how to do 2 things without crashing: how to blit pieces of bitmaps on the screen and how to change colours, so that's what I went with.
No sprites, no bobs, no copper, that's for the next one!
Downloads on https://demozoo.org/productions/335741/
Here's the video
Should run on any Amiga with at least 1MB of chip ram.
(That's because I'm lame and don't know yet how to do proper memory management or compression on Amiga)
And there seem to be some severe audio/video sync issues on some systems 😕
(That's because I'm lame and I have no idea how to keep 2 seperate processes in sync on Amiga)
Just scratching the surface and so much still to learn, but boy, what an interesting machine, that Amiga ... right ?
For those unfamiliar with the demoscene, it's a geeky gathering, usually with some friendly competition, to show off creative and technical skills by making "demos": a short media production combining graphics, music and cuttin edge programming into 1 showcase.
Specifically in the retro computer scene, it's also a continuous quest to see how far you can push these wonderful machines and to make them do things never dreamed possible.
We opted for a 64kb "intro" for the Classic Commodore Amiga 500 - a personal computer released in 1986 with 1MB of total memory and a humble CPU running at 7mhz. (basically: a computer that is a thousand times slower then your current phone)
mA2E came up with this funky tune, I did the graphics, GigaBates coded the effects and made it all happen.
Some screenshots:
 |
 |
 |
And here's a video capture of the demo.
- Can we reduce the colour count even more?
- Can we half the height and double it again in code while palette-shifting it, without sacrificing too much detail?
- Can we replace some parts with copper lines?
- If we loose the dithering, it compresses 1kb smaller, is that worth it?
- Can we optimize the palette even more to squeeze out those last few bytes?
- Nobody codes directly on Amiga anymore: it's all cross-compilation.
- Writing your own tools pays off: this is such a niche of a niche, that general purpose image software just isn't up for the job.
Being able the add the stuff I needed to my https://github.com/steffest/DPaint-js was super helpful to quickly iterate and get the most optimal results possible.
So: colour cycling, fine-grained palette controls and frame based animation will be part of the next release. - Hats off to GigaBates: I made rough versions of my ideas in JavaScript that need a modern browser and a multi-gigahertz CPU to run, he was able to transform that into super optimal assembler that runs on a standard 7mh Amiga 500 ... impressive!
That was fun, let's do it again!

The trend of enhancing retrocomputers with new hardware expansions is still going strong.
Nowadays we can "implement" hardware designs in software and use FPGAs and raspberry PIs to replace and improve old and aging components.
The newest star is the PiStorm32: a bridge between the expansion port of the Amiga 1200 and a raspberry PI.
This means you can use the modern features and speed of a raspberry PI to "emulate" all sorts of Amiga hardware.
The piStorm32 supports the rasberry PI 3A, 3B and 4. PiStorm is an open source project by Claude Schwarz.
I got mine from Cédric who was kind enough to produce a first batch of the PiStorm32-lite
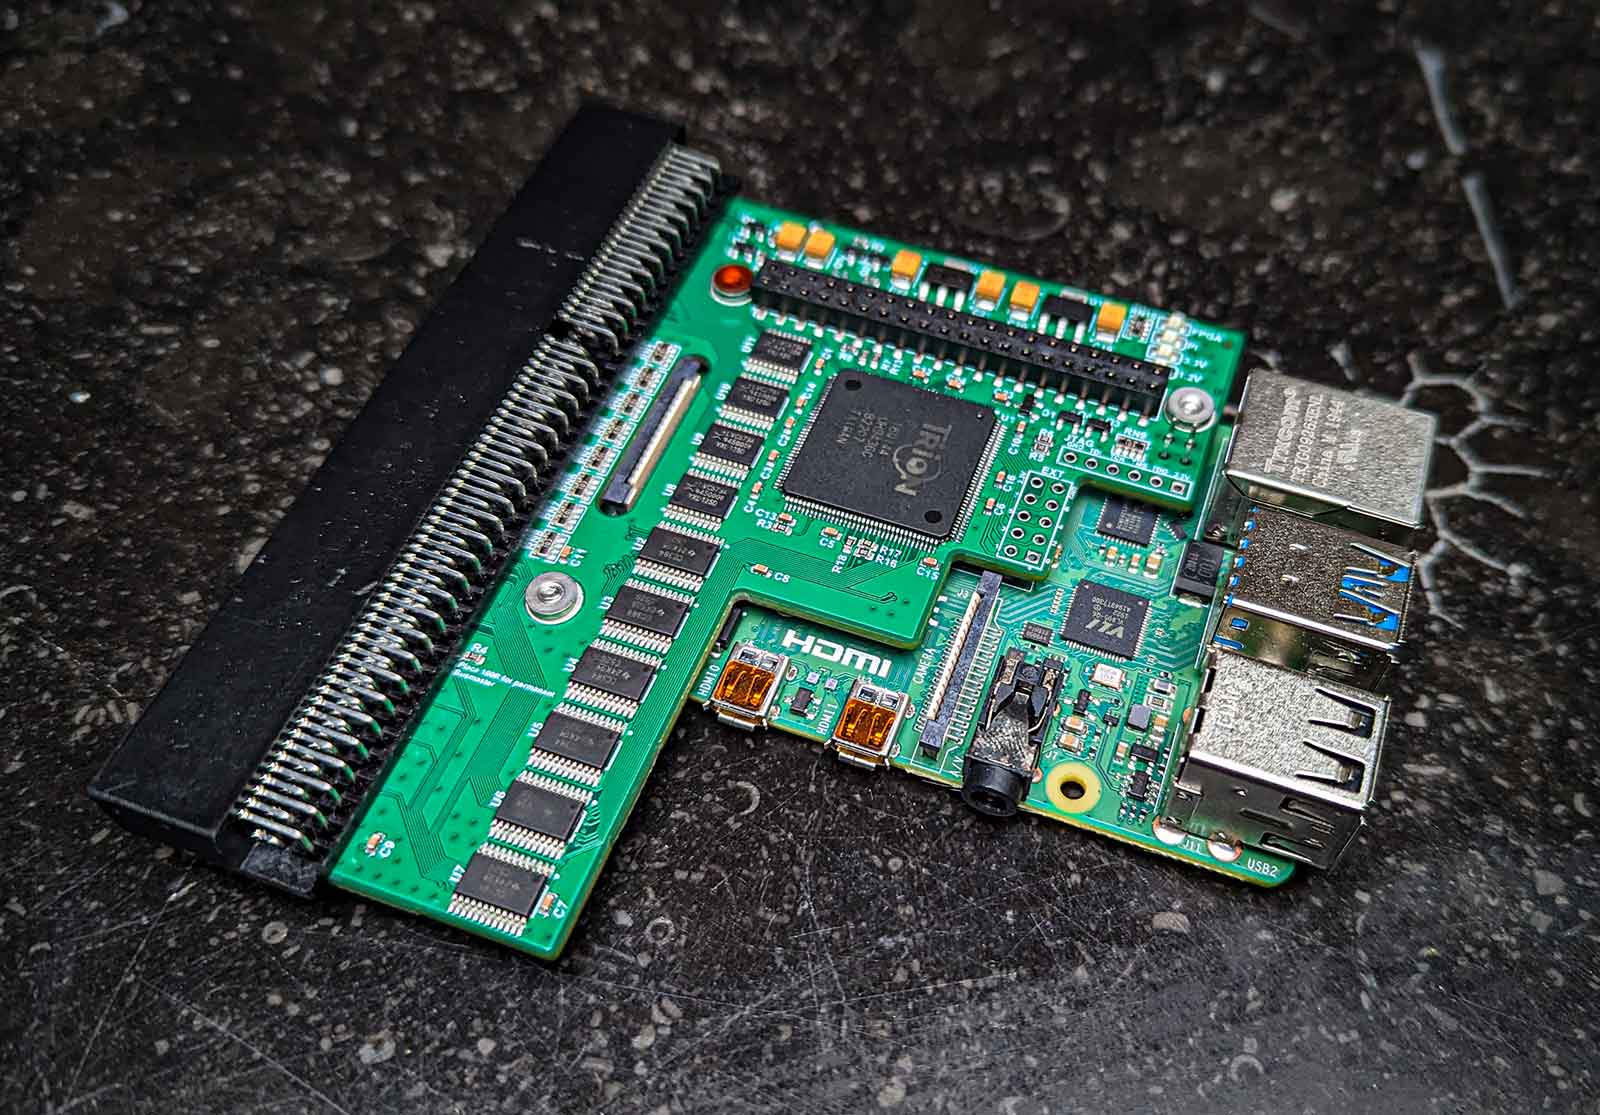
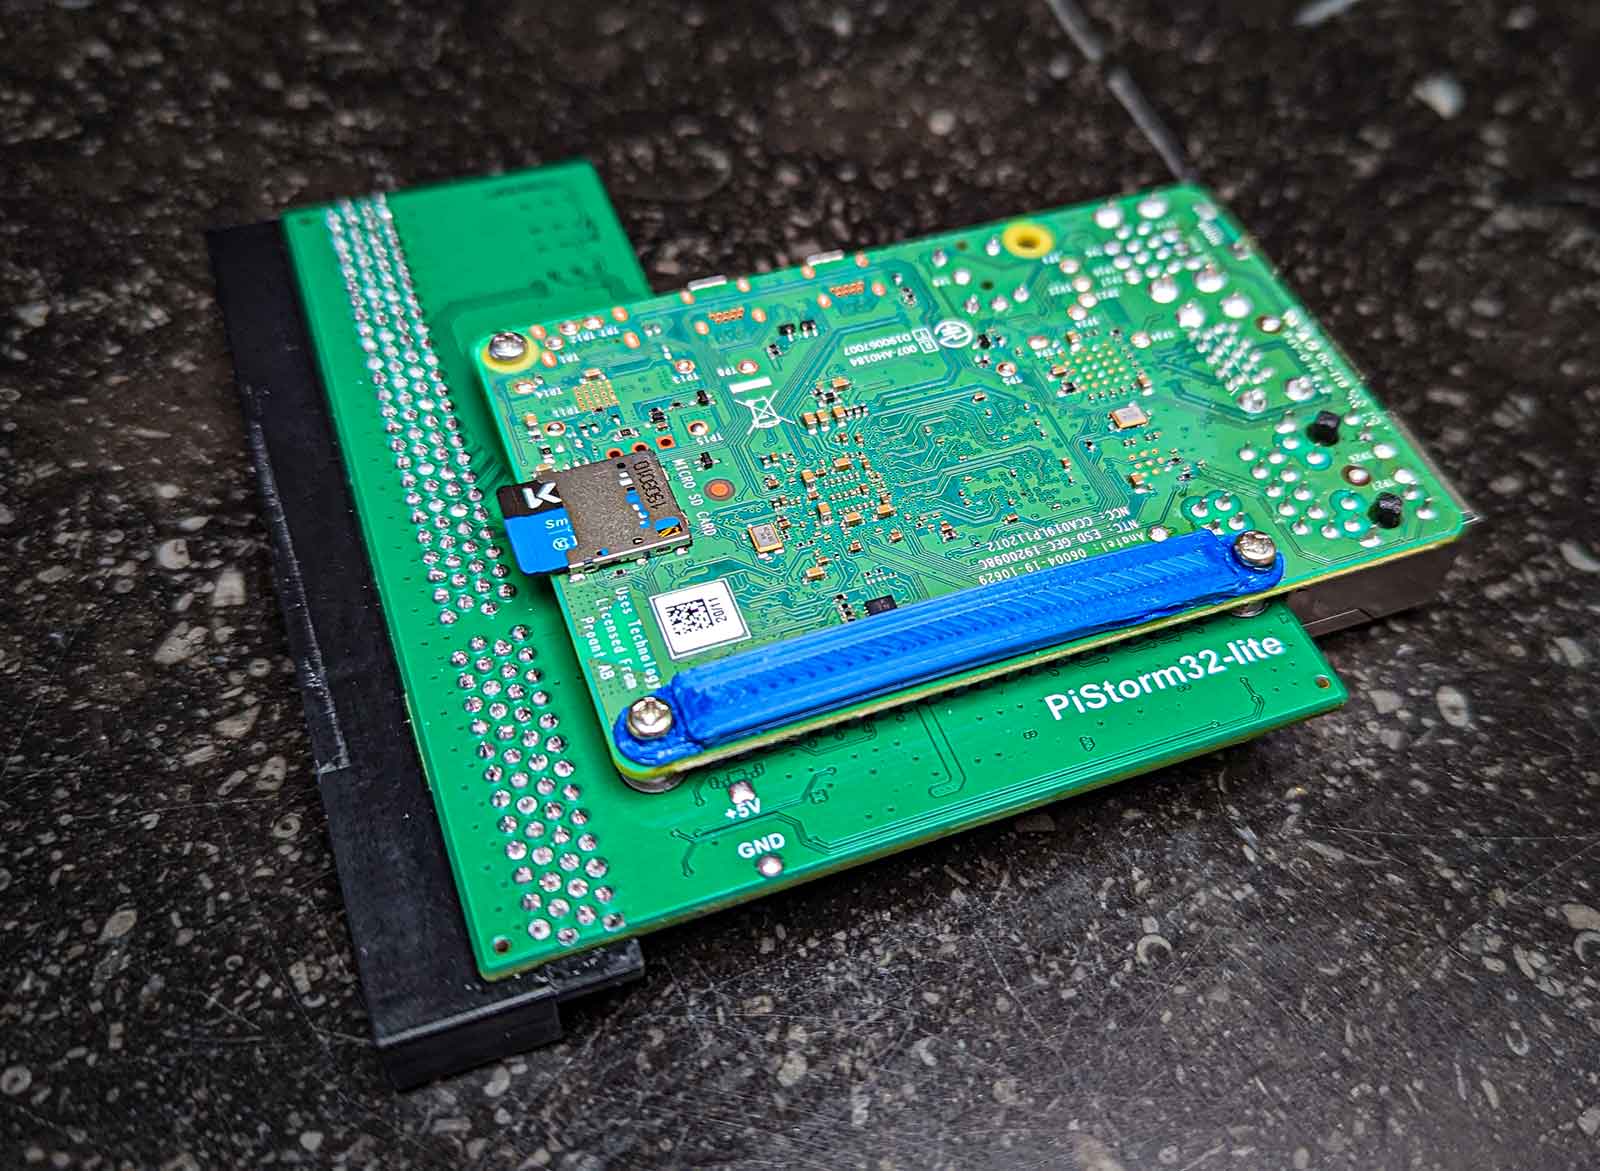
(note: the "lite" in the name doesn't mean there's a "full" version somewhere, it means the original hardware design was updated to work around the world-wide component shortage)
Note that there are 2 main ways you can use the PI in the piStorm:
One way is to run linux on it, and configure your Amiga emulation from the linux side. This feels a bit ... yuck and is a few bridges too far for me: when you switch on the Amiga, you have to wait untl the Linux side has booted for it to provide emulation services. The benefit is that you can use this linux bridge also for things like networking etc, but I feel: if you want to go that route, why not just install a dedicated emulation package like Pimiga or AmyBerry on the PI and be done with it.
The other way - much more exciting - is Emu68 - this is a bare metal 68k emulator for ARM devices. Ok, it still has to boot, but as it's bare metal, it boots in milliseconds and it's WAY faster to emulate the 68k CPU.
Emu68 is a project of Michal Schulz.
I already got a PI3A+ running in a Amiga 500 and 2000, so I mostly was interested in the potential speed increase of using a PI4. Boy ... Is was not disappointed!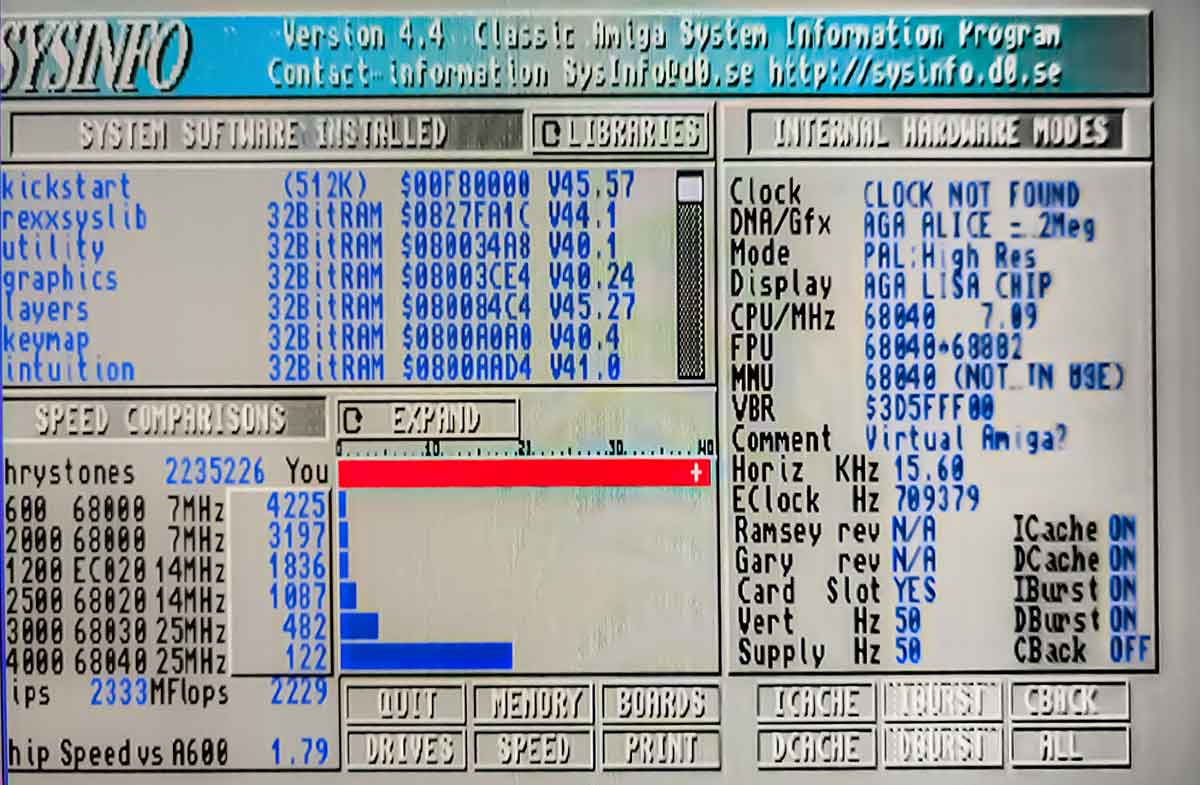
This ... thing ... flies!
Ok Ok, I know the Sysinfo benchmarks mean doodly squat whern JIT emulation is enabled but still: it does show the shear horsepower: 2333 MIPS / 2235226 dhrystones ... I've never ever ever seen such numbers.
And it's noticeable: everything seems zippy zippy fast.
It also seems the slow CHIP ram access mostly has been solved.
The fast ram is configurable and by default set to 2GB. 2GB Ram in an Amiga .... that's insane.
I really like that you can access all the settings and configuration of the PI from inside the Amiga.
From the Amiga side you also get all the tools to monitor the PI.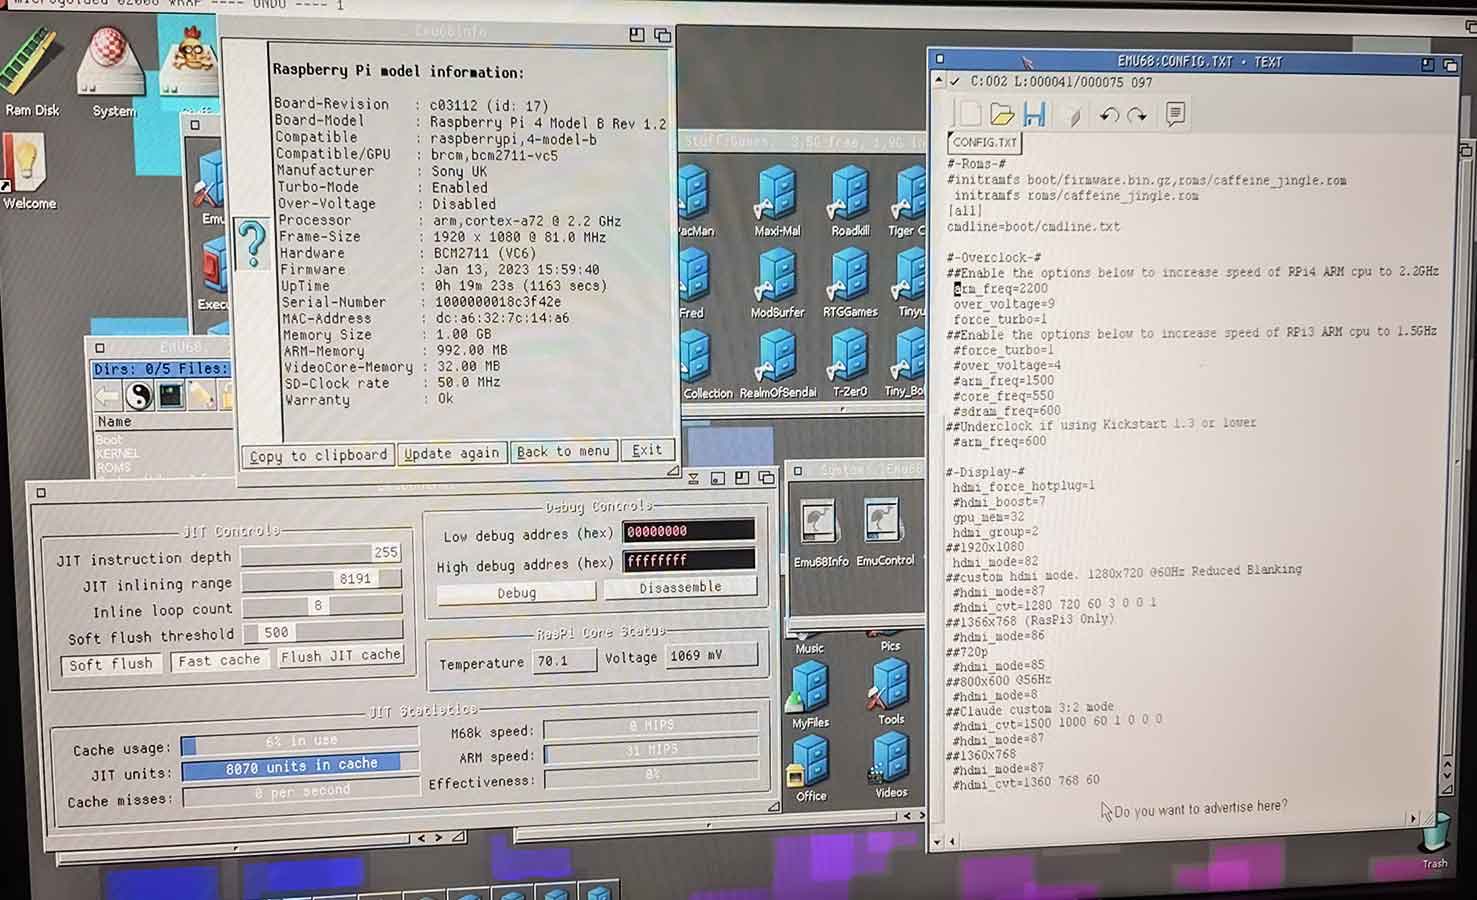
By default the PI4 runs at 1.5GHz but there's a setting to make that 2.2Ghz. (That's how I got those 2333 MIPS)
The PI runs at 70°C then - compared to 50°C cliocked at 1.5GHz. Still well within limits.
The configuration files are stored on a FAT32 partition on the SD card that you can access from the Amiga side.
This also means you can use this partition to quickly share files between the Amiga and your PC/Mac. Super handy.
One of the nice things of the piStorm, is that it acts as any other accelerator card: you can still use all the native Amiga hardware.
For example, you can still boot from your internal IDE interface, or floppy disk even. It then just provides the ROM, RAM and CPU.
If you really want to go "stock" again, you can completely disable the piStorm by holding down the reset keys while booting. Nice.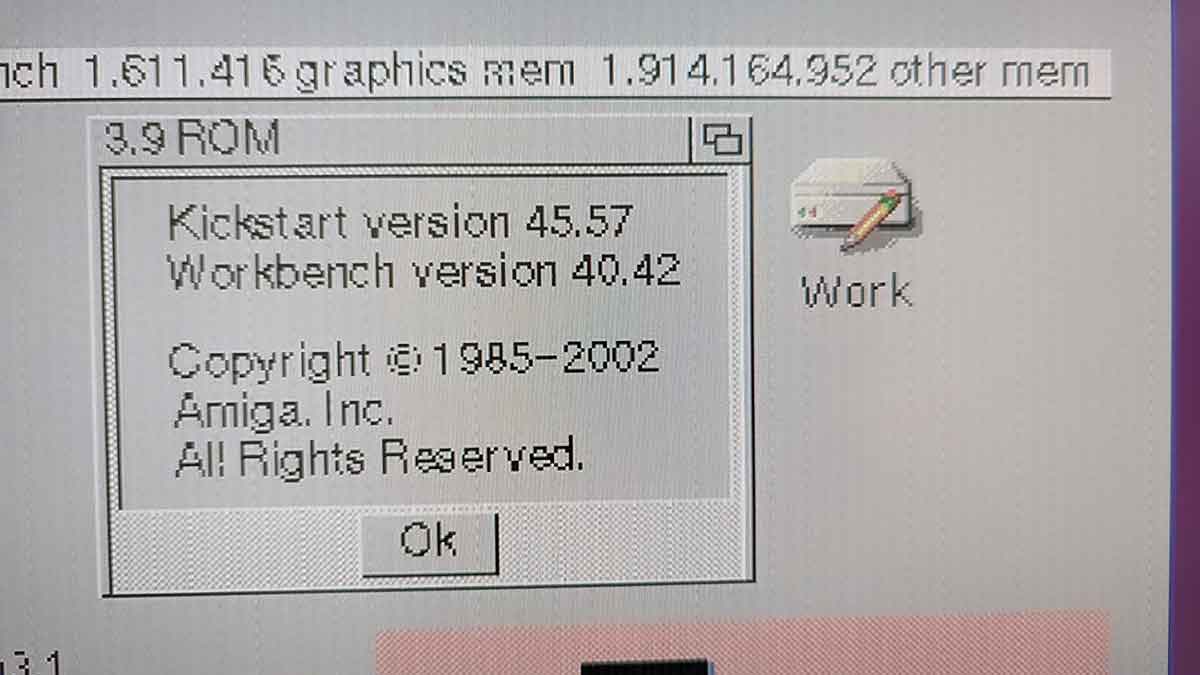
But you don't put in a piStorm in your 1200 if you want stock, of course ... you want SPEED!
Did I already mention it's fast?
MPEG and AVI video plays smoothly, decoding mp3 is hardly noticeable (in contrast to a main task that drains even a 060 CPU).
Obviously the software that gains the most of the CPU and RAM boost is the software that plays nice with the system and avoids direct hardware banging. Emulating other systems for example: these run mostly on the CPU and require some ram.
Here's the Classic MacOS 8 being emulated on the Amiga, running PhotoShop 4.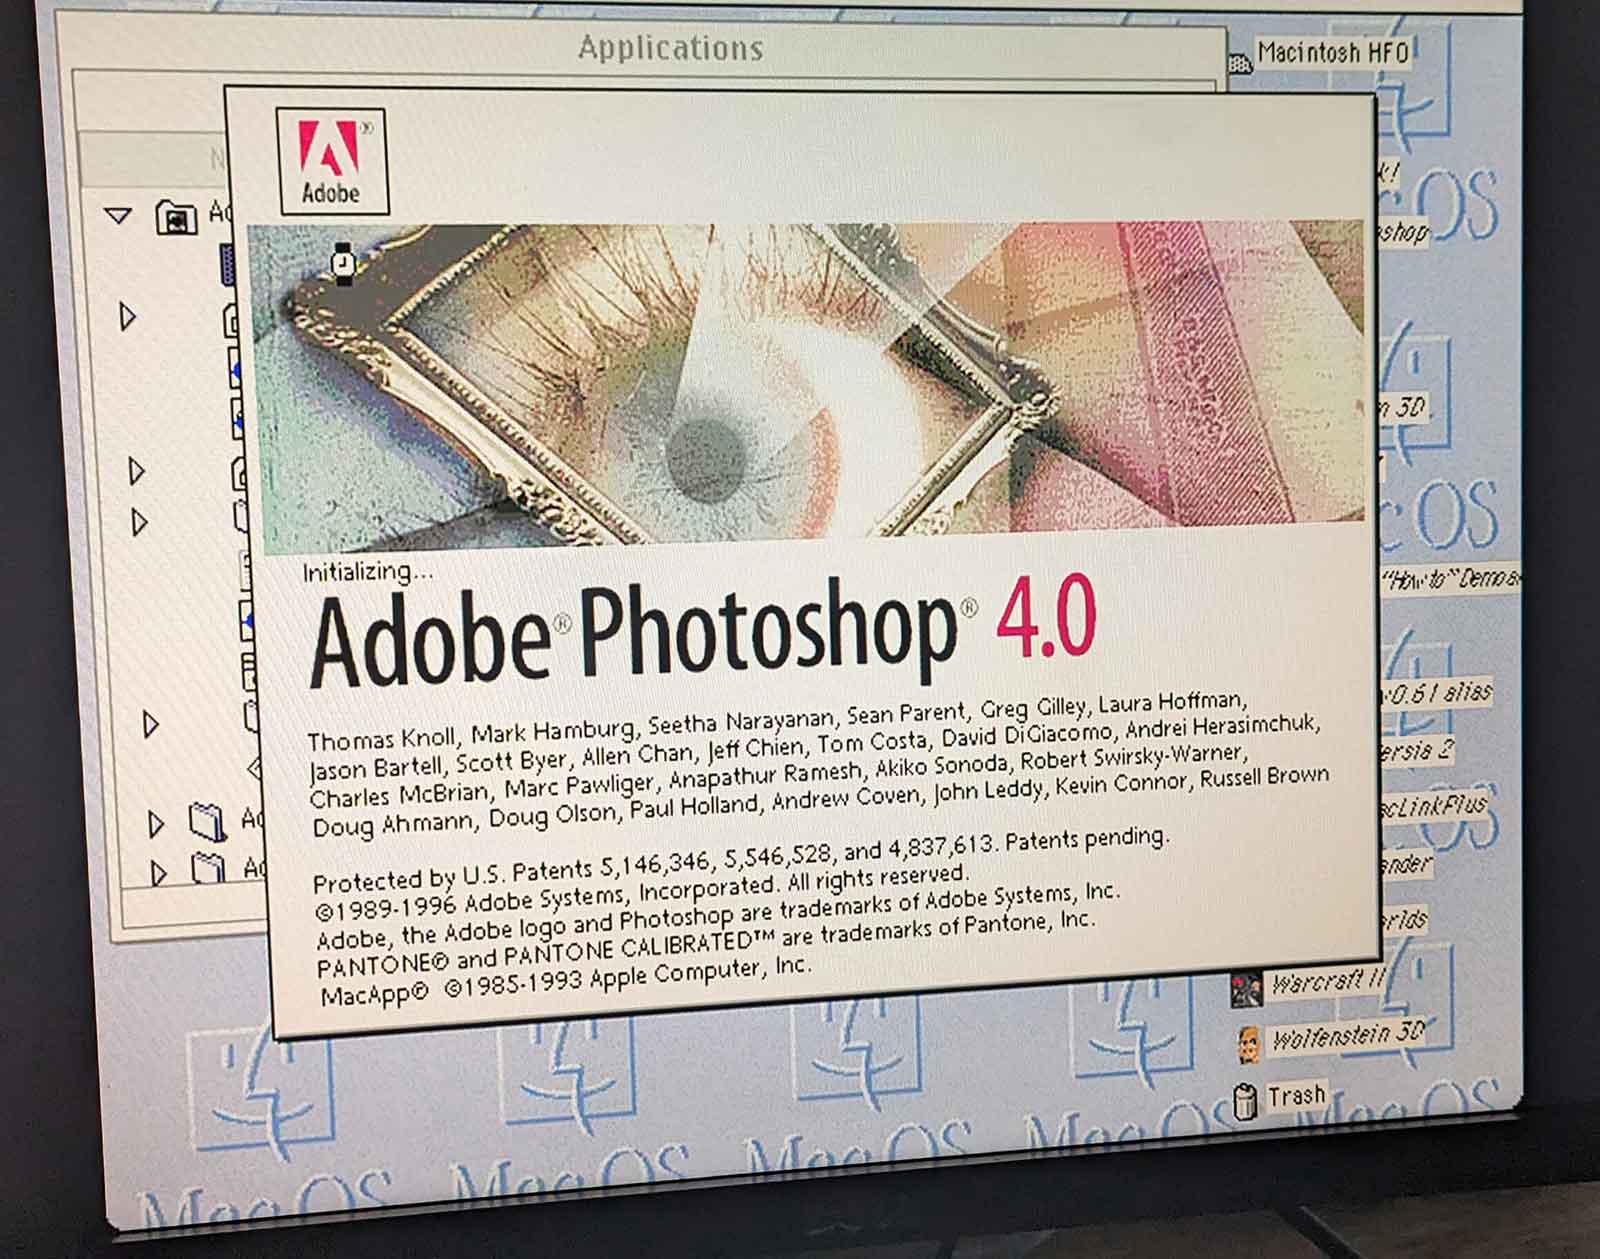
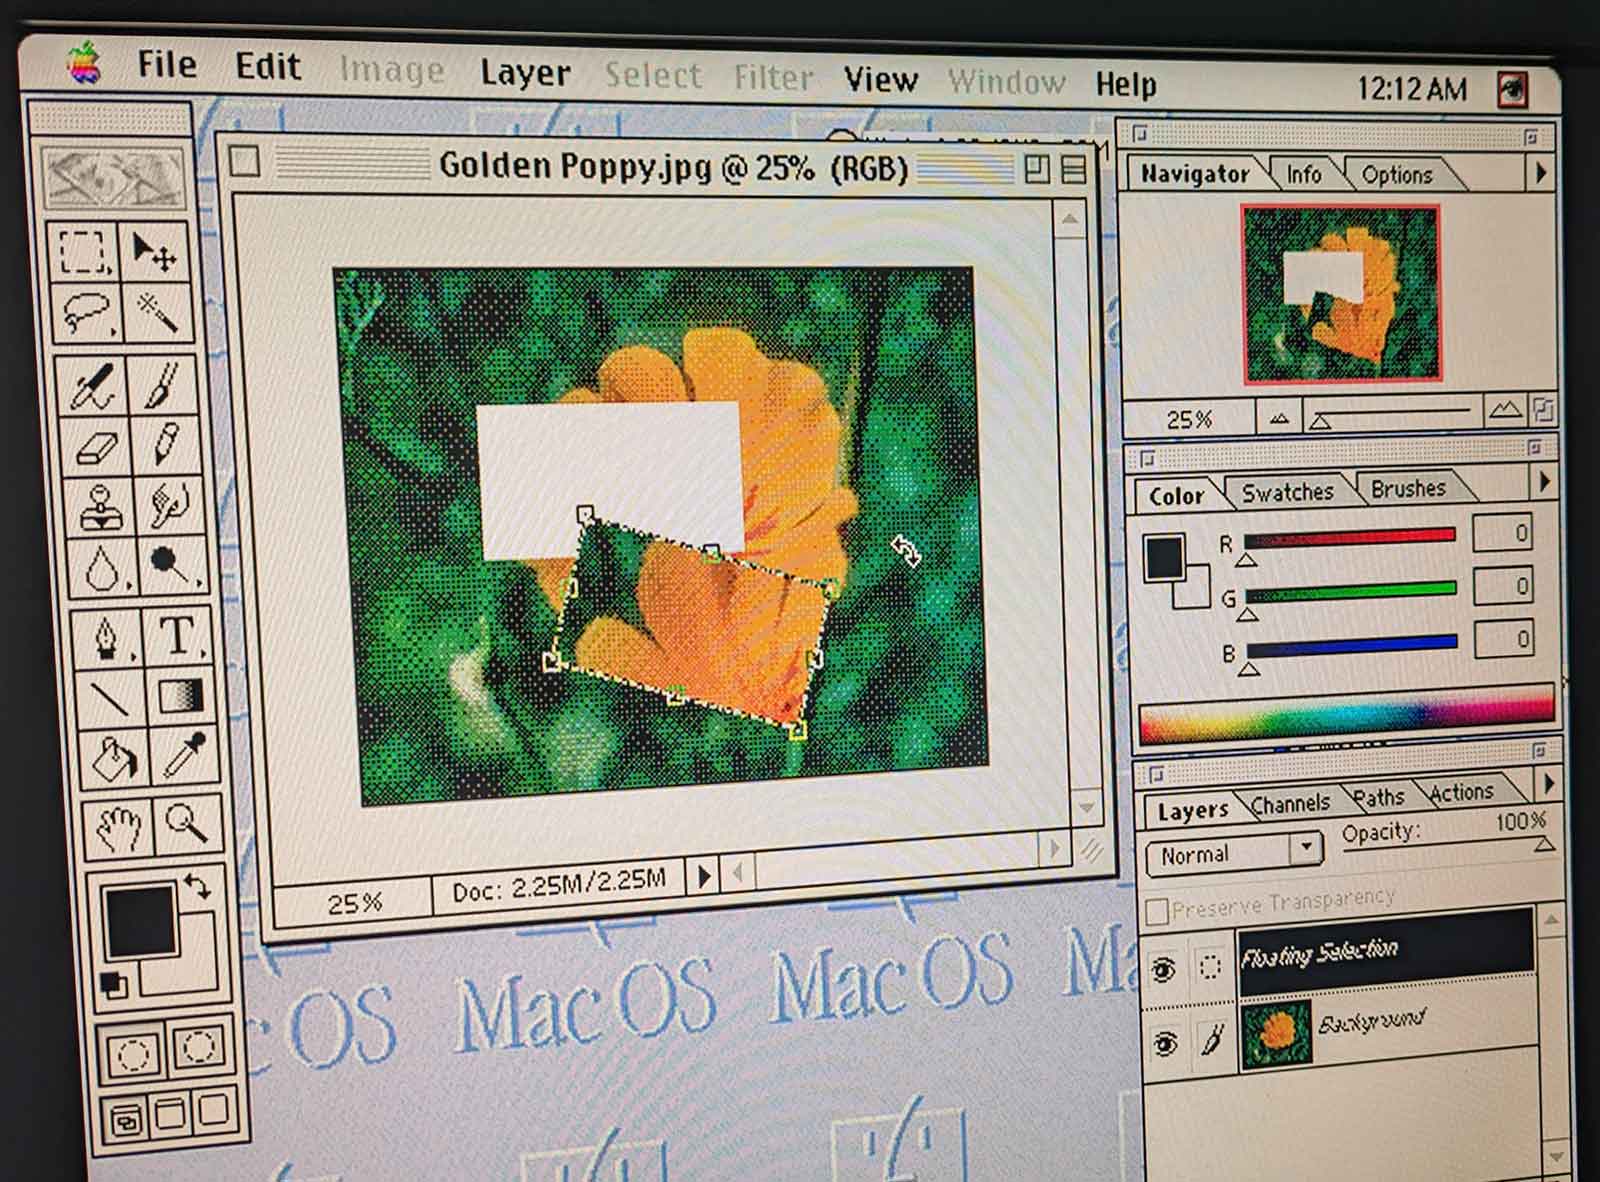
Faster then it ever was, including on the original mac hardware.
Is it all good?
No.
As with all "super accelerator cards", compatibility with hardware banging software like games and demos is not super great.
WHDLoad goes a long way of ironing out the kinks, but still I experienced frequent crashes running some games and demos.
So if you're main interest is playing classic Amiga games or watching demos, the piStorm is not your best friend.
But then again: with the kind of performance the PI delivers, it might even make more sense to run these things in an "emulated Amiga" on top the real Amiga. perfectly doable and about the only way to ensure the "hardware" is exactly era-correct and what the software expects.
Another annoying part is the cable clutter the PI introduces, especially if you want to extend the SD cards to be accessible from outside the case.
Of course, this is no different then with other cards for the Amiga 1200, but the PI can be more extreme if you want to access the regular PI ports like USB and Ethernet too. I guess it will be another round of extension cables and 3D-printing to make it all fit nicely.
About 3D printing: the PI3 has plenty of space, but the PI4 pushes a bit against the trapdoor it 's closed.
I guess designing and printing a trapdoor that gives a bit more space and ventilation for the PI is a good idea.
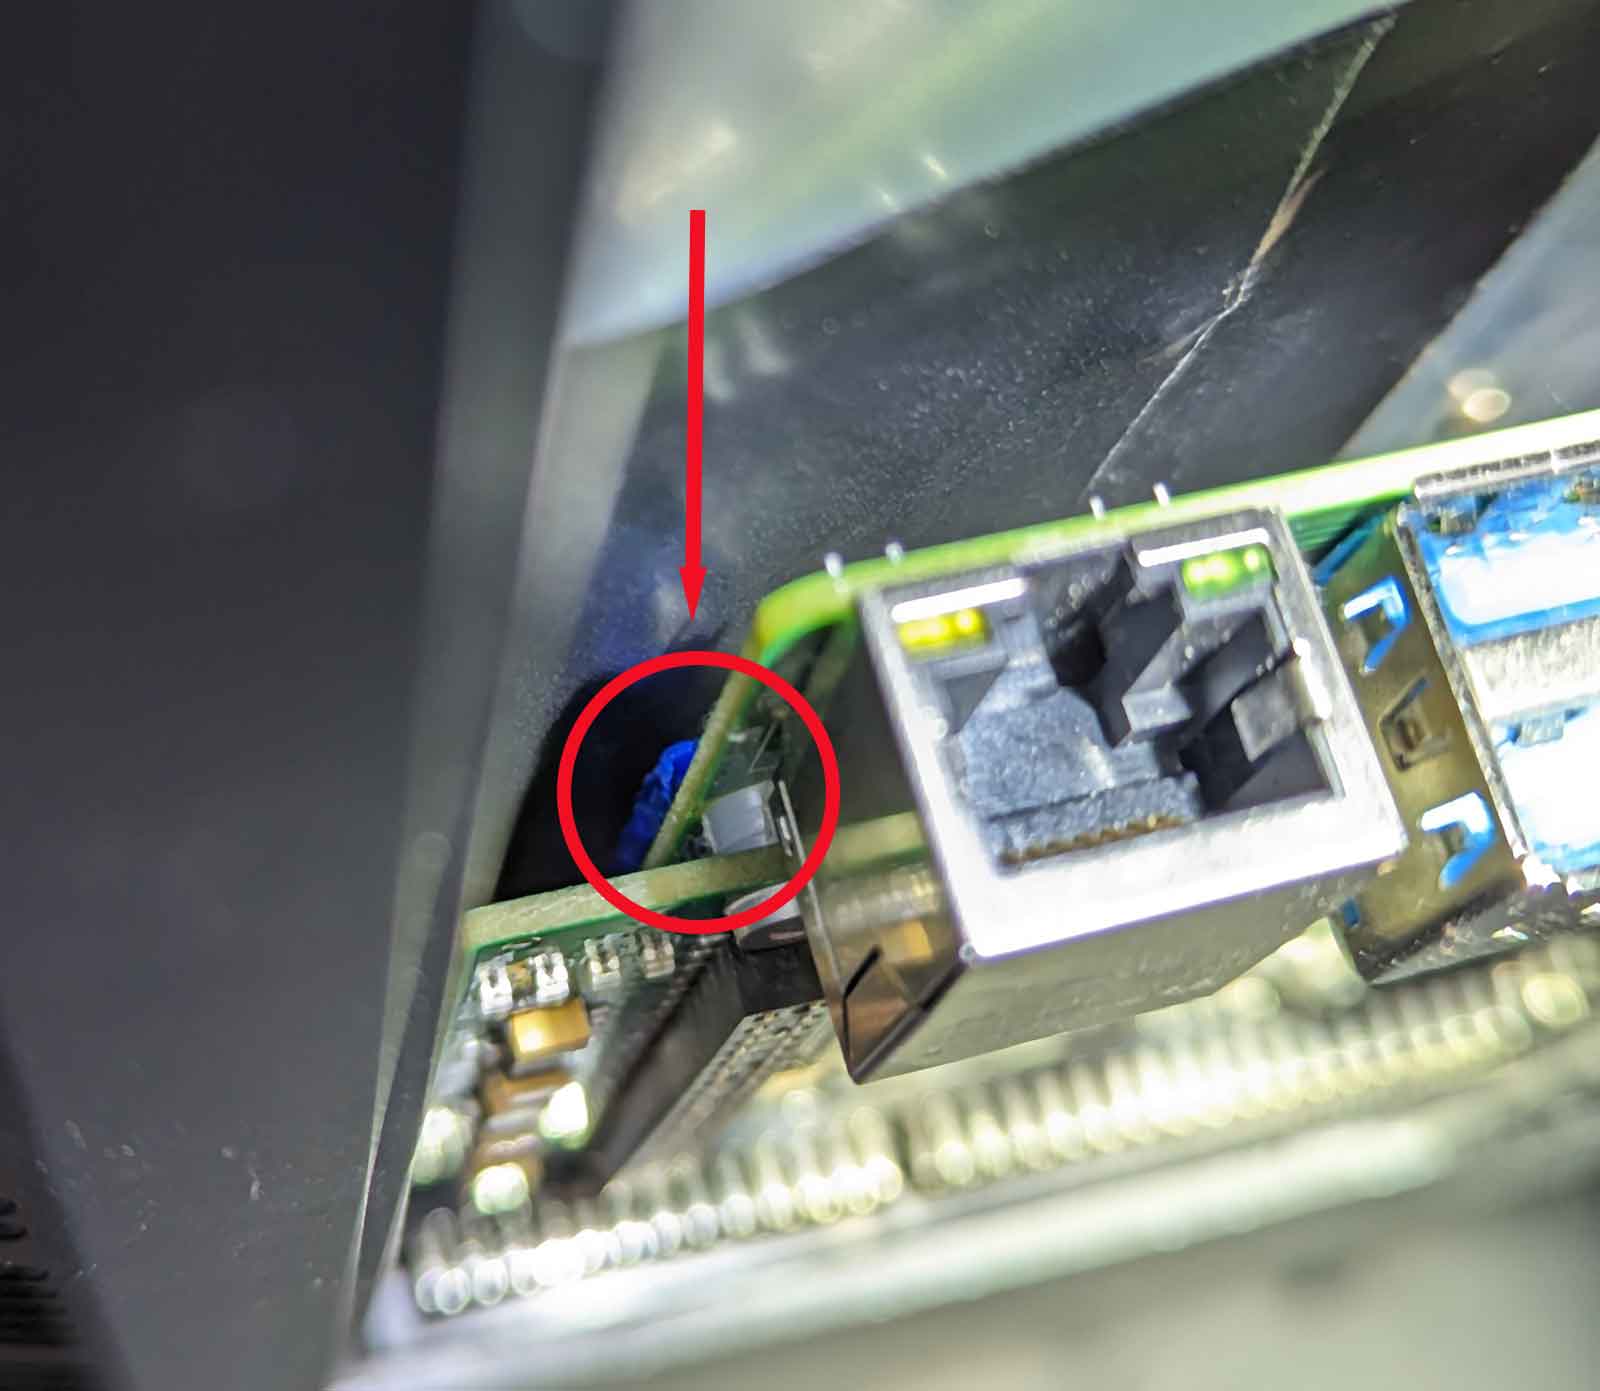
Likewise, the PI GPIO pins are VERY close to the metal of the Amiga keyboard. For that reason it's really recommended to put some extra insulation between the metal keyboard plate and the PI.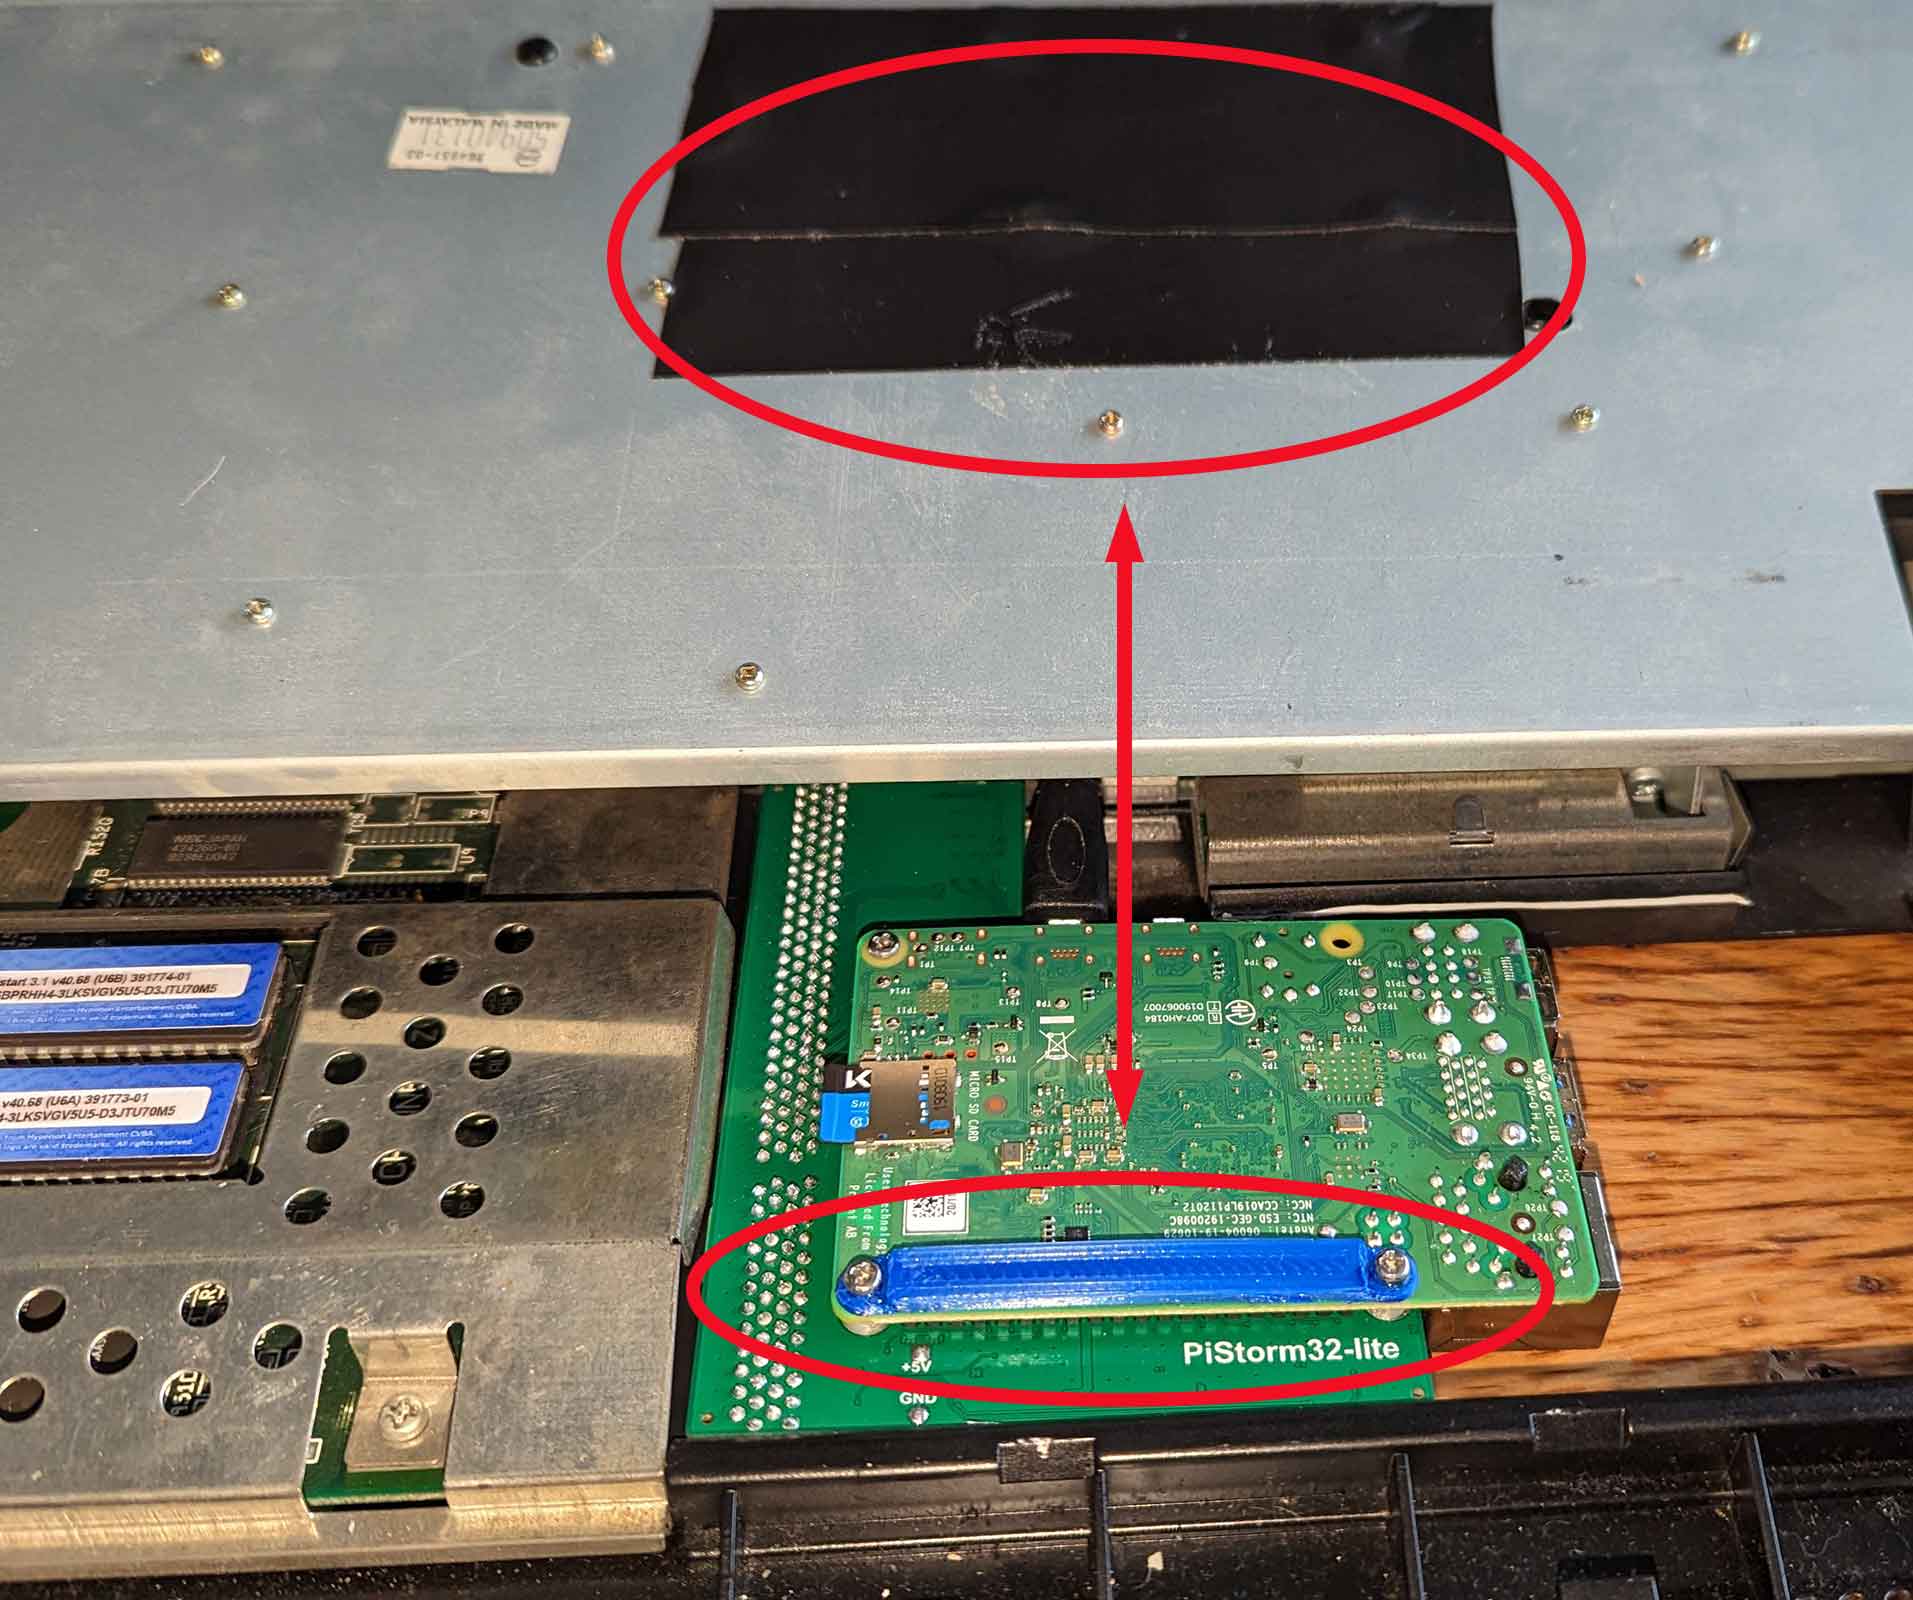
Verdict:
I love it.
It's clear that this is THE future of Amiga accelerator cards.
Yes, it still has it's flaws, but things are progressing rapidly and everything is open source.
What a big contrast with those other fast Amiga Accelerator cards ...
I must say one of the first thoughts in my head when testing the piStorm was "Ouch ... this means game over for Apollo"
with the PIStorm delivering 4 times the performance at a quarter of the price of those other cards, it pretty hard to justify getting an IceDrake or a TF1260 ...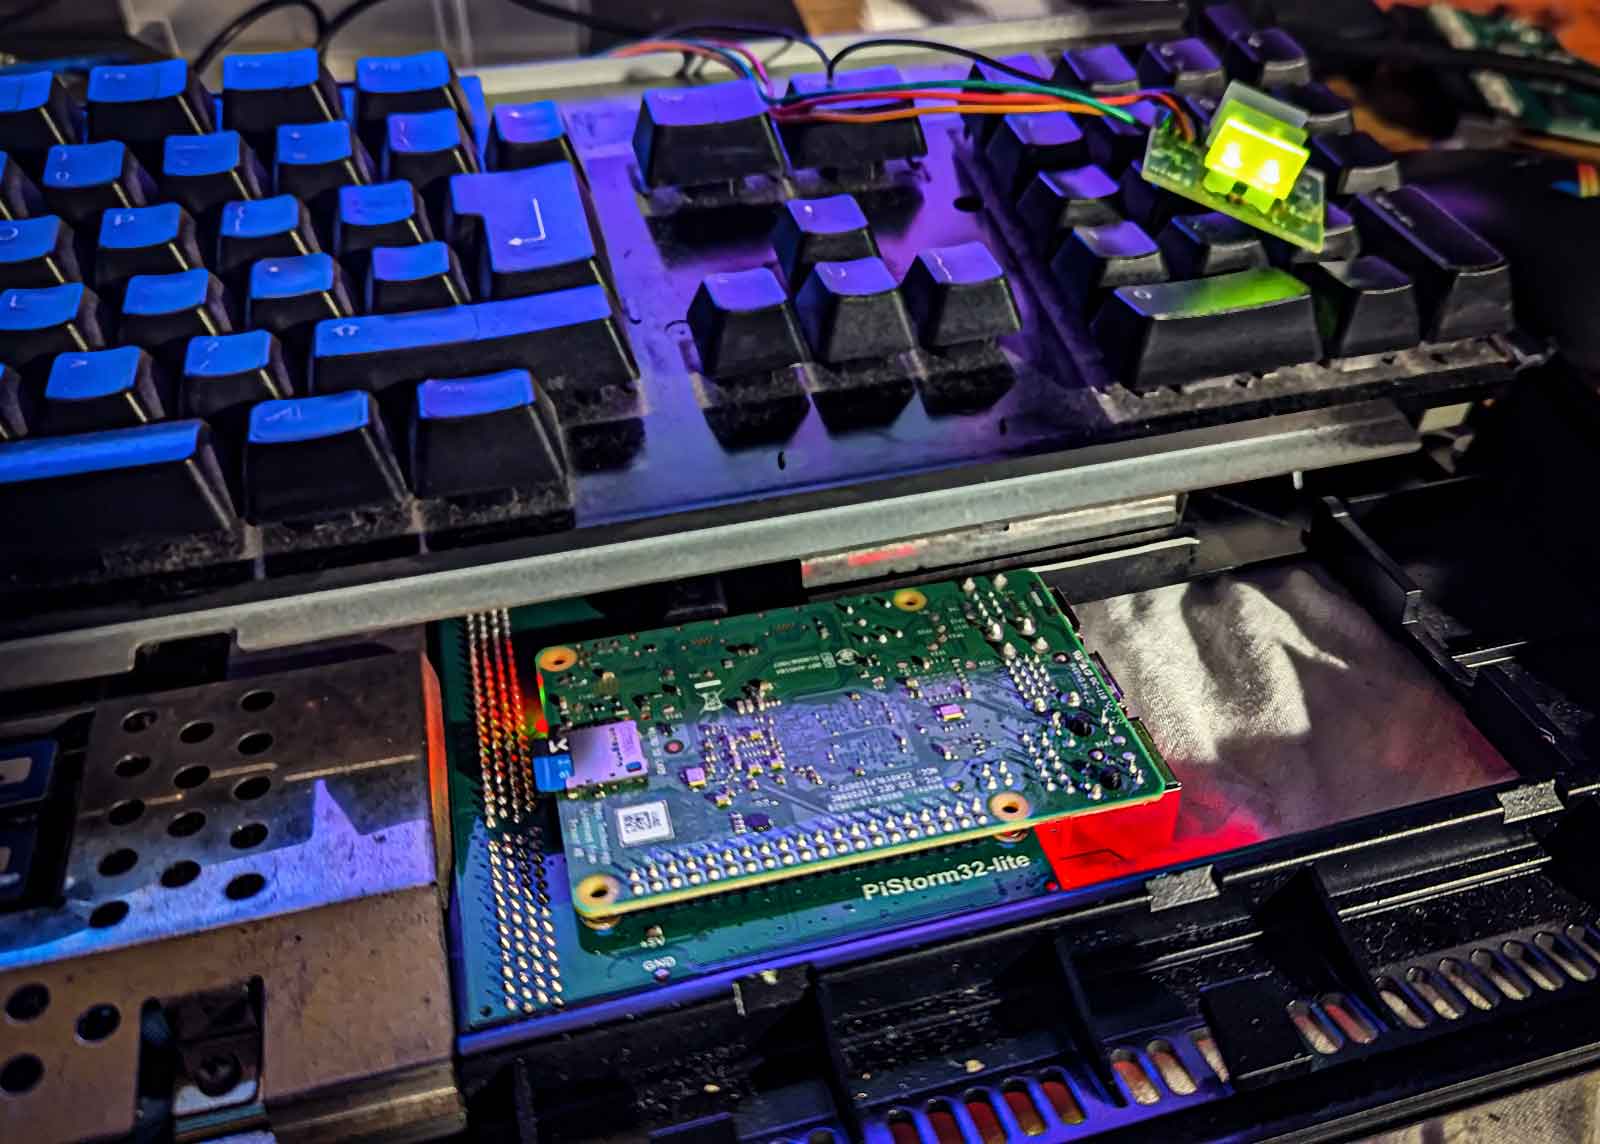
What I like:
- Insane performance, especially at that price point. At this moment it's simply THE fastest classic Amiga ever.
- Can be easily disabled to revert to stock hardware
- It's still "just a PI": pop in another SD card and you boot directly into the PI to do non-Amiga stuff
- easy file transfer between Amiga and PC/Mac using the SD card.
- All configuration and monitoring available from the Amiga side.
What could be better:
- Switching between RTG and Classic display modes is still a pain
- the ususal cable/port extension issues if you want to access the PI ports from outside the case
- Still some compatibility issues with older "hardware banging" software
Excellent excellent work by Cédric, Claude, Michal and many others.
If you like the project, please consider becoming a Patreon of Michal and/or voicing your support on the PiStorm Discord channel

Aan de ene kant heb je de tirannieke dictator.
Op papier leidt hij een democratie, maar hij weet wel beter.
Hij is een narcist die niet maalt over "de waarheid", die de media manipuleert en uit is om zelf aan de macht te blijven.
Of misschien vooral nog om zijn persoonlijke rijkdom uit te bouwen.
Hij overtuigt zijn land om - met hulp van de bondgenoten - andere landen binnen te vallen als hij denkt dat dat winst gaat opleveren, uiteraard allemaal met een goed verhaal.
Er is immers een bepaalde "dreiging" die moet worden afgewend.
De waarden en normen zijn in gevaar en moeten worden verdedigd.
Niet altijd is dat binnenvallen fysiek: de belofte van financiële en militaire steun werkt soms evengoed.
---
Aan de andere kant heb je de populist. Hij opereert in een democratie, maar hij speelt het spel beter dan wie ook.
Hij is een narcist die niet maalt over "de waarheid", die de media manipuleert en uit is om zelf aan de macht te blijven.
Of misschien vooral nog om zijn persoonlijke rijkdom uit te bouwen.
Hij overtuigt zijn land om - met hulp van de bondgenoten - andere landen binnen te vallen als hij denkt dat dat winst gaat opleveren, uiteraard allemaal met een goed verhaal.
Er is immers een bepaalde "dreiging" die moet worden afgewend.
De waarden en normen zijn in gevaar en moeten worden verdedigd.
Niet altijd is dat binnenvallen fysiek: de belofte van financiële en militaire steun werkt soms evengoed.
---
En ertussen zit het plebs. Niet denigrerend bedoeld want ook ik hoor erbij.
Het plebs kiest partij, roept hoe slecht die andere wel niet is en trekt ten strijde.
Digitaal uiteraard, op social media met vlaggetjes en slogans, met steunbetuigingen aan de goeden, met aanvallen op de slechten.
Ze worden aangespoord en vooruit gestuwd, gevoed door welgemikte beelden, video’s, verhalen en grapjes.
Maar pas op voor die verhalen van de andere kant, want die zijn niet echt, dat is propaganda en niet te vertrouwen.
En de nuance, de rede, de menselijkheid? Sorry, daar is geen plaats voor.
Je bent voor of tegen, wit of zwart.
Ik voel mij precies niet meer thuis in deze wereld.
Waar zit toch die poort naar dat parallelle universum, waar misschien wèl iedereen naar het midden vloeit, in plaats van naar de buitenkant.
Waar onvermijdelijke verschillen en conflicten worden bekeken als interessante nieuwe invalshoeken in plaats van als dreiging.
Waar misschien elke man of vrouw juist dat is: mens tussen andere mensen.
Ondertussen zet ik beter "het nieuws" af, en focus mij op mijn kleine wereld waar ik wel invloed op heb. Op de mensen die ik graag zie, en zij mij.
Ik weet dat het een bubbel is, maar het is een bubbel waar ik mij gelukkig wel thuis voel.
I did a new "paint job" on an Amiga case. (Normally they are white)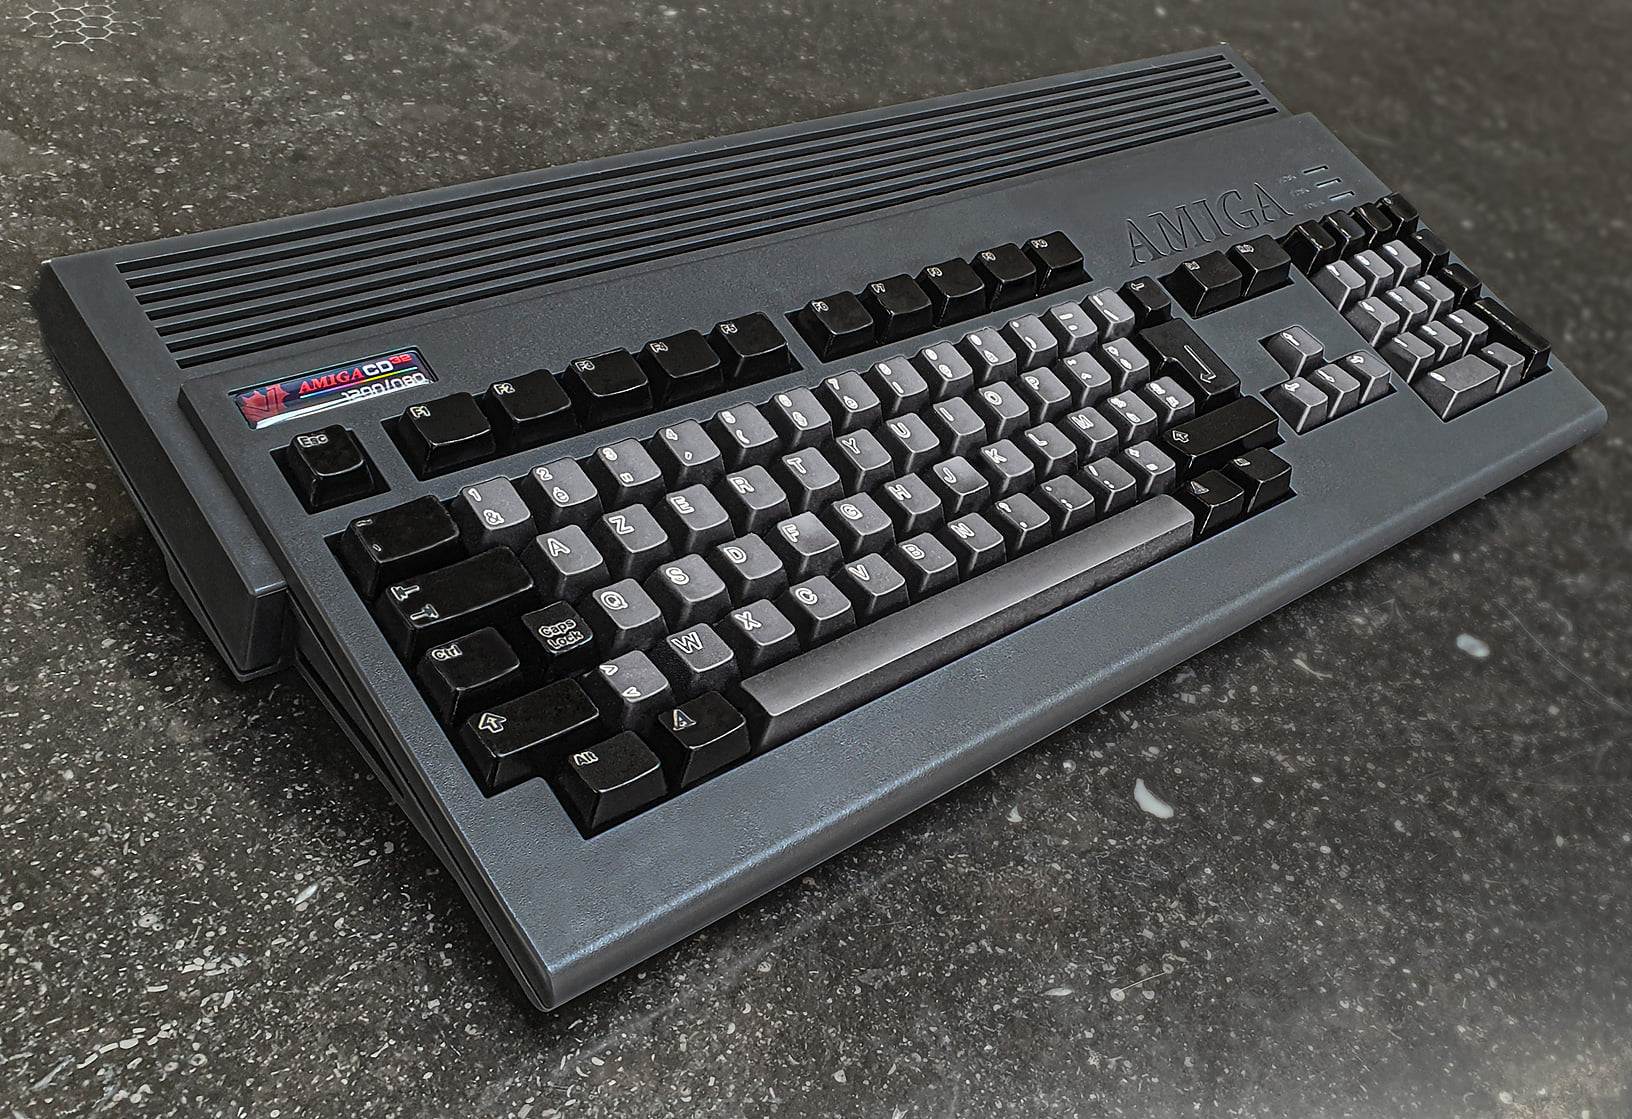
I am totally in love :-)
The case is one from a1200.net in "CD32 grey".
I also pre-ordered the matching keycaps like 2 lifetimes ago - but they still have to deliver, always a lurking issue with these kickstarters.
Anyway - I decided to do a DIY.
I posted it on some forums and got surprisingly many reactions asking how I did the keycaps.
Super easy actually, but here it goes.
I used iDye Poly. It's a dye that bonds with most plastics but - luckily - it doesn't bond with the little protective cover that is on the letter of the keycaps on Amiga 1200 models.
This result in the original key-color shining through as a small border around the lettering, making sure the letter is still readable.
Rather a funky effect!
Before dying, make sure you're keys are super clean and evenly coloured. I even brighted mine a bit with hydrogen peroxide.
The instructions that come with iDye Poly are meant for dying fabrics. They tell you to use boiling water, but whatever you do: DO NOT BOIL YOUR KEYCAPS!
They will warp and bend, making them unusable. (believe me, I know from experience :-/ )
I used water of about 50 °C.
Add the dye, add the color intensifier that comes with the dye.
Stir, pop in keys.
I use a 1 liter transparent plastic bottle with a wide opening. That way you can close it and give it a good shake, making sure all keys are subdued in the dye.
I used the "silver gray" color for the gray keys. The dye works pretty fast and I only left them in for about 2 minutes.
The black keys I left soaking for a few hours (in the color "black") and that was a mistake.
After some time, the dye builds up to a sticky goo, making the keys a bit smudgy.
I evened them out with some acetone rubbing but still they are not a sharp as they should be.
I finished them of with a few layers of matte varnish for the gray keys and high-gloss for the blacks.
I knew upfront this would make them dust-magnets but hey ... looking as cool as that is hard work!
then the finishing touch: I designed a custom badge with the vampire logo in CD32 theme and asked the "BadgeMan" to print it.
Cherry on the pie!
I did one before - a 600 model.
There I did the complete case and painted the keys black.
I applied some Amiga-specific keyboard stickers made by iComp.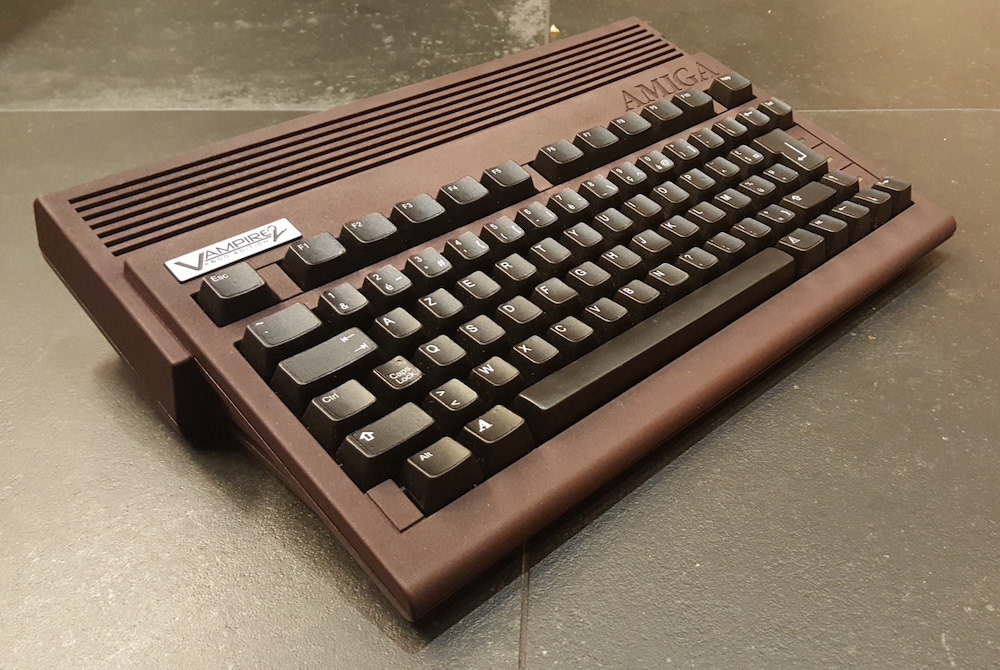
Also nice!
![]()